Pro Tips
For high-quality performance of work when plastering the furnace, professionals recommend:
- Proper mixing of the solution. To do this, you can take a small amount of the mixture and roll the ball in the palm of your hand. If cracks form on it, then you need to add a little water.
- The mixture should be viscous so that it can be easily applied.
- Before starting work, all cracks must be repaired.
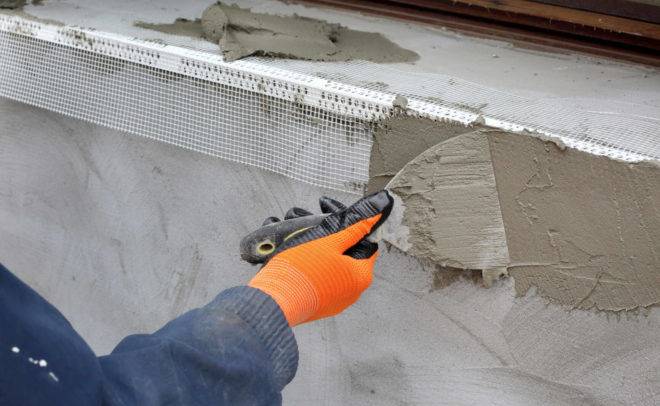
- To strengthen the plaster, use a reinforcing mesh.
- After plastering, you can not immediately melt the oven, otherwise the coating may crack. You need to wait until it is completely dry.
For high-quality plastering of the furnace, the main thing is to knead the solution correctly - it should not be too liquid or thick. Following the instructions will allow you to avoid common mistakes and get a durable and aesthetic lining of your home oven.
Surface preparation process
It is important to start work with the surface treatment of the furnace. If there is old plaster on it, it must be removed
Exposed brickwork must be perfectly clean. For cleaning, you can use a spatula. The surface must be cleaned carefully, avoiding sudden movements that can damage the masonry.
If cracks are found on the surface, they should be treated with special oven glue.
To treat cracks, the glue is brought to a state of thick sour cream, after which the surface must be cleaned of dust with a brush
Then, it is important to moisten the same brush with water and process the holes. Further, this defect must be treated with glue using a spatula.
After all defects have been eliminated, it is necessary to apply a primer mixture to the working surface. An acrylate mixture is suitable, which is able to penetrate deeply into the material, fill all the pores, and form a film on the surface.
It will provide a stronger connection between the primer and putty. The mixture should be applied with a brush and rubbed in. After that, it is necessary to dry the oven, leaving it on for a day.
General rules for work
Before directly plastering the oven on the work surface, the following work must be performed.
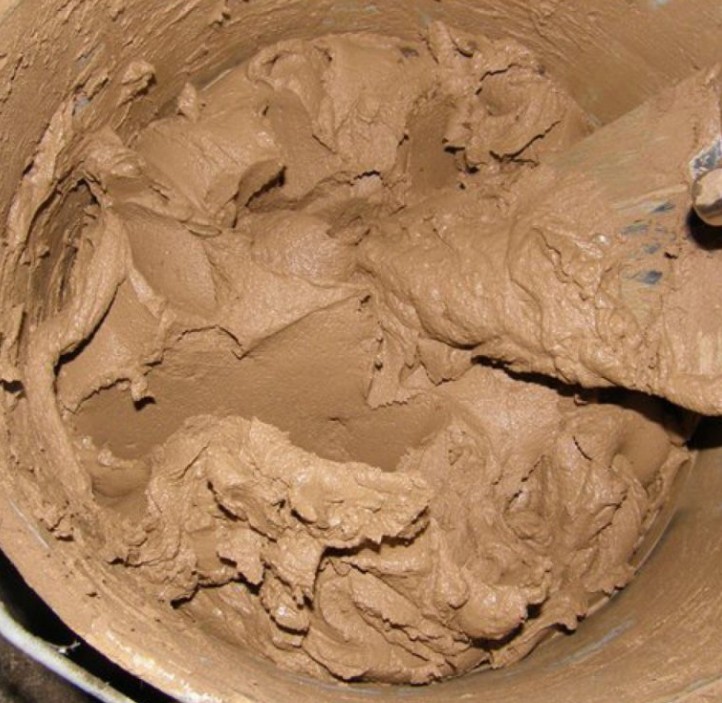
- The plaster must be stirred to bring it to a state of homogeneous mass, and the consistency of thick sour cream.
It is important to remove all contaminants from the working surface of the stove (dust, remnants of the old plaster that was used when laying the stove). To improve the “gripping grip”, you need to clear the masonry seams to a depth of about fifty millimeters
Before applying, it is important to melt the oven a little in order to achieve 20-25 degrees of heat; On warm walls, the plaster will lay down more evenly and an excellent level of quality will be achieved.
After all the preparatory procedures, you need to proceed to the main part:
- Additional surface cleaning.
- Crack processing.
- Surface primer.
- Installation of reinforcing mesh.
- Furnace plastering
Do-it-yourself plastering of ovens
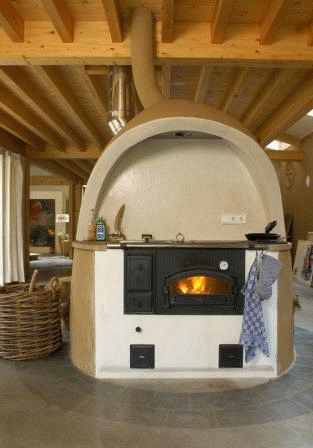
When erecting a stove or creating a fireplace, you will need not only to decide on their project, but also on the facing material, mortar for fireplaces and stoves, chimney, backing bricks. A direct component of the process of creating a fireplace or stove is a solution for lining the stove or fireplace. The appearance of unlined stoves, as a rule, is not aesthetically pleasing, in addition, dust accumulates in the seams of the masonry, which, when the stove is heated, becomes a source of unpleasant odors. Do-it-yourself plastering of stoves or lining them with decorative ceramics, tiles, glazed tiles, etc. allows you to avoid such unpleasant consequences.
The composition of solutions for plastering furnaces
The composition of mixtures for stoves and fireplaces may be different.For plastering the stove, you can use simple clay or complex mortars: lime-clay-sand, lime-gypsum, cement-clay-sand. The solution for plastering the oven can be prepared both independently and bought ready-made. Which dry mixes for the oven should be preferred in your case.
Plastering ovens with clay is the most common application. The plastering of the front surfaces of the structure is started after the brickwork has completely hardened, when the possibility of its further shrinkage is excluded. As a rule, it takes at least a month for this. Properly prepared composition of the mortar for plastering the oven is a guarantee of a long service life.
To prepare a clay solution, the clay must be soaked the day before the start of work so that it absorbs water. The sand is pre-screened. A mixture consisting of soaked clay, sand and water is stirred with a perforator with a mixing nozzle until a homogeneous mass is obtained.
The amount of sand required to mix into the clay is determined by the degree of its fat content. With a high value of this indicator, the proportion of the constituent components of the mixture is either 1/3 or 1/4. An increase in the strength of the plaster is facilitated by the addition of crushed fiberglass or asbestos fiber (0.1 / 0.2 shares) to the clay solution.
PAY ATTENTION: a well-prepared solution for plastering the oven should be relatively easy to lay down on its surface and at the same time be well smoothed
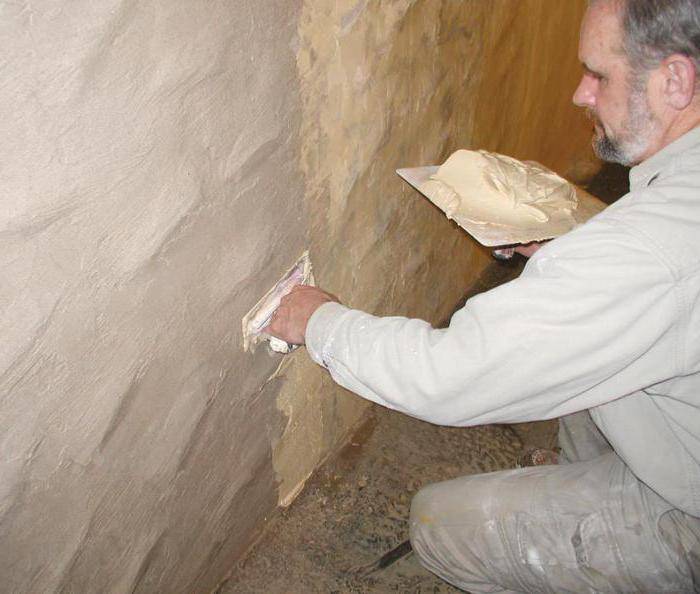
How to put plaster on the surface of the furnace?
The beginning of the work is preceded by cleaning the front surface of the structure from dirt, dust and residues of masonry mortar. To improve the adhesion of the mortar to the surface of the brickwork, the seams are first cleared to a depth of about 0.5 cm. Before facing, the oven is heated so that the mortar is applied to the warm walls.
How to prepare plaster for the oven? Below are the proportions of the most common types of plaster mixtures for plastering stoves:
Required tool
 When carrying out work on plastering the furnace on your own, you should prepare in advance the appropriate tool and containers for the solution:
- trowel or plaster spatula;
- falcon;
- grater and trowel;
- rule;
- metal brush;
- brush or brush for wetting the surface;
- construction mixer;
- corner rail.
When preparing the solution, you will need a shovel, scoop, measuring container, sieve, scales, a container for mixing ingredients. It is better to control the leveling of the surface with a building level. To remove old plaster, a chisel and a hammer may come in handy. A vacuum cleaner will help get rid of dust.
The choice of plaster composition
The question of how to plaster brick oven walls is the most important when planning such an event. It should be said right away that the usual cement-sand mortar used when plastering the walls of a building is not suitable for furnaces. It will just crack in a very short time. For plaster, you can use a ready-made mixture designed specifically for this purpose, or cook it yourself, but according to a special recipe.
 To resolve the issue of how to plaster, simple 2-3-component mixtures and complex compositions with the addition of various ingredients (fiberglass, asbestos, salts, plasticizers, etc.) can be used. The composition of the solution also depends on the type of brick used for the construction of furnaces (chamotte, red brick, silicate varieties, etc.). Certain components added to the plaster increase its adhesion to the material.
If a decision is made to use ready-made materials, then you need to purchase a stove or fireplace plaster mix. All the necessary ingredients have already been introduced into it, and preparation for application consists in diluting with water in the proportion indicated in the instructions.When using them, one nuance should be taken into account: their long-term storage is undesirable, because atmospheric moisture can lead to premature hardening of the mixture in the form of poorly soluble lumps.
Most often, home-made mortars for plastering ovens are prepared in the following types:
- clay;
- lime-clay;
- lime-sand-clay,
- lime-gypsum;
- cement-sand-clay.
The practice of furnace construction shows that it is these compositions that are least susceptible to cracking when heated. Other additives are added to improve the properties.
When preparing the solution, it is important to choose the right proportions of the ingredients. Precisely selected composition allows you to easily and evenly apply a thin layer on the furnace wall
In particular, a certain consistency of the composition is used as a grout. The viscosity of the solution is regulated by the proportions of water, plasticity largely depends on the amount of sand, and the more it is, the less the elasticity of the mass.
Problem Features
Why is it recommended to plaster a brick oven? In terms of increasing the reliability of the entire structure, it should be noted that the plastered brick is protected from direct exposure to aggressive bathing factors (temperature changes, moisture, steam). The brickwork itself increases the strength and tightness of the seams. The bonding material is less prone to cracking. The 2nd important reason is to improve the appearance. The stove after plastering has a flat surface of the walls, which makes it neat and makes it possible to create a certain interior.
//www.youtube.com/watch?v=kXcpeiwD3dw
Brick oven plaster has its own specific features. First of all, this is due to the high temperature on the walls during its operation. The plastered layer must withstand the following influences: prolonged heating and open flames, temperature fluctuations, mechanical influences, smoke and steam, oil splashes during cooking. In the process of heating the oven, the brickwork tends to expand significantly, and therefore the plaster mortar for ovens must have increased elasticity in order to withstand such loads without cracking.
One of the functions of the stove is to heat the room. This condition dictates 1 more requirement for oven plaster - good thermal conductivity. If additional significant energy is required to heat this layer, then the efficiency of the entire structure will decrease significantly. In addition, when heated, the material used for plastering should not emit substances harmful to the human body.
Purchased heat-resistant mixtures
Also, ready-made plaster for the oven can be used for finishing. There are many types of such mixtures. But the most popular are Pechnik and Terracotta. The advantage of such plasters in comparison with those prepared by oneself is a high degree of heat resistance. "Pechnik" and "Terracot" are able to withstand temperatures up to 200 degrees.
Whatever mixture is used to plaster the oven, purchased or home-made, it is not necessary to immediately prepare a large amount of it. The volume of a single serving should not exceed 8-10 liters. In any case, it is necessary to develop a solution for a maximum of 2-2.5 hours.
Finishing stoves and fireplaces after plastering
How to paint a plastered oven?
In the future, the plastered surface can simply be whitewashed with water-based emulsion, lime, chalk, painted with heat-resistant paint, colored varnish and decorated with stucco. Since oil solutions darken faster under the influence of temperature, it is better to use pentaphthalic paint or nitro enamel.
Teach that all heat-resistant compounds have a very pungent odor, and when dried, they release toxic substances, so it is better to work with them in a respirator. Such compositions dry longer than conventional ones.
Decorative plaster
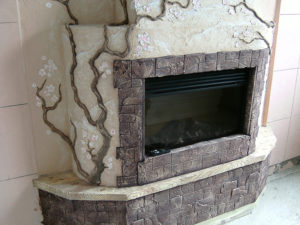 As decorative, you can use mineral compositions such as Bayramix, Misan, Ortner, etc. The surface of the stove or fireplace looks very original, finished with stucco or rough decorative primer, and then treated with latex water-dispersed dyes.
Another interesting option is to add brick flour to the water emulsion with further coating with a colorless heat-resistant varnish. For decoration, special plastic stamps for plaster are also used, with the help of which all kinds of embossings are made on the surface. Material costs with this method are minimal, and the stove or fireplace, finished in this way, looks just great.
Tiles and tiles
As mentioned above, ceramic tiles can only be glued to those walls of fireplaces and stoves that heat up slightly, for example, on a fireplace chimney. On hot surfaces, even heat-resistant tile adhesive will not last long.
Tiles have been used for hot oven walls for centuries. This is a special ceramic tile with a rumpa - a frame on the back, which is filled with clay or sand. In the walls of the rump there are holes for fastening the tile in the oven masonry to wire or pins.
This type of finish has many advantages:
- the thermal pad of the tiller allows you to keep warm longer without additional heating;
- protection against burns and fire at home;
- reliable mechanical fastening will not allow the tile to fall off;
- a beautiful front side will turn the stove from a means of heating into a home decoration;
- the surface covered with enamel or glaze is easy to clean.
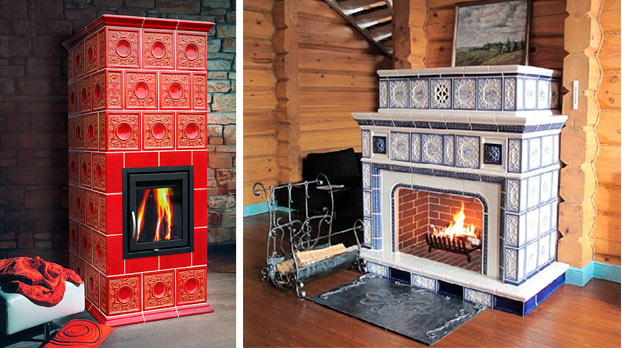
Glazed tiles are not only a functional cladding solution, but also a way to create a unique interior for your home.
So, decorating stoves and fireplaces with your own hands is not such a difficult process. Subject to the sequence of work and the right choice of mixture for plastering and finishing, such a structure can be turned into an original and unusual part of the interior.
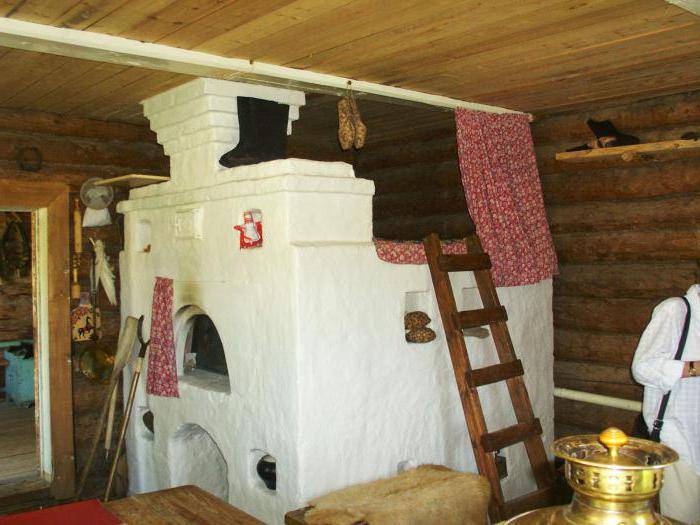
Furnace painting
So, now you know how to plaster the oven so that it does not crack. Of course, after the applied solution dries, its surface must also be whitened. It is best to use a milk-chalk mixture for this purpose. Such whitewash tolerates temperature extremes well and also does not get dirty. In order to prepare it, you just need to mix 1 kg of crushed chalk with 2 liters of milk. You can paint the stove with ordinary lime. Such a finish will also not deteriorate due to high temperatures. In order to keep lime better on a hot surface, you can add a little table salt (35 g per 1 kg) to it.
It is impossible to paint stoves and fireplaces using oil paint. The drying oil, which is part of such a coating, will begin to evaporate at high temperatures, and an unpleasant odor will appear in the room.
Solution preparation
If you want to save money, make a mortar for plastering ovens yourself: the proportions and preparation technology are below.
Simple mortar
Prepare a simple mixture like this: sift the sand, mix it with clay, pour it into a container, add water and stir with a mixer until a creamy state.
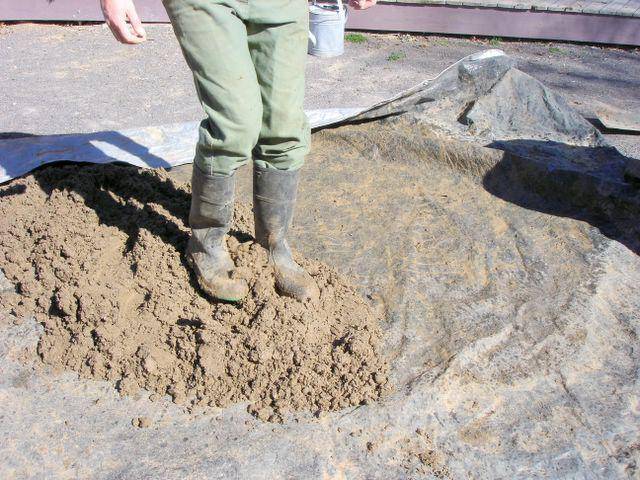
Proportions clay and sand for plastering ovens depend on the fat content of the clay. If it is oily, 3-4 parts of sand are added to one part. To determine the fat content of clay, put it in a bucket, pour water and stir at the same time until creamy. After scoop up a little plank. If the clay covered it by 1 mm, then it is not greasy. If a thick layer - oily.
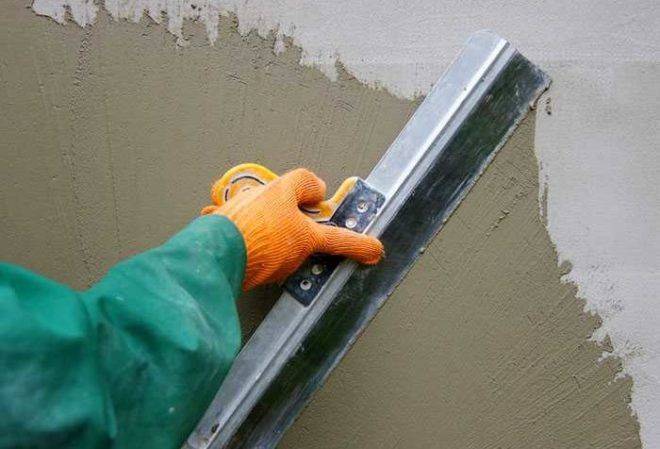
Nakryvka
The last layer of plaster is necessary in order to level the surface of the furnace completely. The primer must be sufficiently moistened before application. The solution in this case should be used even less thick than for the first two layers.The mixture should fill absolutely all the cracks and irregularities remaining on the surface. The thickness of the coating layer can be from 2 to 5 mm. It is impossible to level the stove in planes with plaster. Ultimately, the total thickness of the finishing layer should be no more than 1-1.5 cm. When laying out brick ovens for the house with your own hands, this should be borne in mind. When doing this work, you should try to initially make the walls as even as possible.