Gas stoves in our kitchens, despite their undeniable advantages, have always been, are and will remain a source of increased danger. Even such modern improvements to the “hearth”, such as gas flow control or an automatic ignition system, will not save the situation in case of installation errors. Each owner needs to study the information on how to properly connect the gas stove, since you will have to collect a package of documents and draw up an agreement with the organization - the gas supplier with your own hands.

Despite the seeming simplicity of the work, it is strictly forbidden to carry out the initial connection of the gas model of the stove with your own hands. At best, such actions will fineat worst - the consequences can be the most deplorable.
Note! In this case, it will not be possible to hide your amateur performance, since the standards and operating requirements provide for a periodic check of gas equipment with mandatory marks in your personal subscriber book.
Sequence of actions when connecting the device
Before carrying out work on installing the stove, it is necessary to go through some bureaucratic procedures in the gas management service of your area: conclude an agreement for the supply of gas to the apartment and open a personal account.
What documents do you need to provide to connect the gas stove in the apartment:
- owner's passport;
- certificate of state registration of residential premises or of the right of ownership (contract of sale / donation);
- technical passport for the apartment;
- information about the composition of the family;
- maintenance contract;
- passport for the gas flow meter;
- subscriber book (if a replacement is made for a new stove).

The prepared documentation is checked by specialists, who then issue the following forms for filling out:
- Application for the conclusion of a gas supply agreement for domestic needs.
- The contract itself, which specifies the characteristics of the equipment, the monthly norms of gas consumption and the determination of its volume (depending on the combination of devices), the term and form of payment, as well as the frequency and procedure for inspections.
- Subscriber book containing information about the service organization, full name and address of the subscriber, type and name of the installed equipment, rules for operating gas appliances, a note on briefing with all family members, a work plan and the date of the next check.
As a result of the signing of the contract, the gas management service issues a permit for the installation of the stove in the apartment.
Information on where to go to install a new stove instead of the old one and how much it will cost can be found here. Read about the possibility of a free replacement of a kitchen appliance in this article.

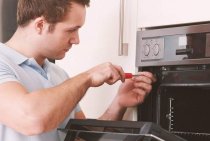
After completing the necessary administrative procedures, the question arises as to whether it is possible to connect the gas stove yourself. The answer to it is unequivocal: it is possible to carry out such work yourself only if the household appliance is replaced with an equivalent one, without interfering with the design of the connection to the gas pipeline.
Important! When self-installation gas stove model you still need to contact the gas service, whose specialists will check the correct connection and make the necessary marks in the documents.
In all other cases (if it is necessary to check / replace a hose or tap, move the stove, etc.), you should contact the gas workers of a service organization or a company specializing in such services.

Preparing to connect
Despite the fact that it is forbidden to connect the stove with your own hands, you need to familiarize yourself with the requirements and instructions for this type of work in order to prepare the kitchen room and the necessary materials.
When connecting the device, the following mandatory conditions must be met:
- The presence of high-quality natural and forced (exhaust) ventilation.
- The distance from the gas pipeline to the stove should not exceed 4 meters, ideally up to 2.
- Since modern devices are equipped with an oven light and an automatic ignition system, an electrical outlet with grounding must be provided near the stove.
Currently, combined stoves are very popular, that is, gas burners combined in one device and an electric oven. If this is your case, then it is necessary in advance (at the repair stage) to bring electricity through a separate power line from the switchboard, using a 3 × 1.5 cable and an additional 16 A RCD.

Necessary materials
As a rule, the masters involved in connecting gas stoves have with them all the tools required for the job. But high-quality materials and fixtures (which are needed for replacement and installation) will have to be prepared in advance by yourself.
Hose
Currently, the standard for connecting a gas stove model prescribes the use of flexible hose, represented by three types: rubber-fabric, rubber with a metal braid and bellows.
GOST R52209-2004 recommends using a bellows gas hose, which is an expandable steel sleeve in a protective sheath. This model is by far the strongest and most reliable, but also the most expensive.

Note! Gas hoses, to distinguish them from water pipes, are marked with yellow blotches in the braid or protective sheath. The connecting hose after completion of the repair work must remain freely accessible.
Dielectric insert
If the device is connected using a rubber hose with a metal braid, it is imperative to use a dielectric insert, which is located between the faucet on the descent and the hose. This simple device prevents the transfer of stray currents through the metal braid from the gas riser to the stove.
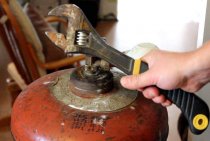
ball valve
In most cases, a flap valve is initially installed on the downstream of the gas pipe, which is recommended to be immediately changed to a ball valve. This type of locking device has a simpler and more reliable design.

sealant
It is possible that a sealant for tight connections is included in the installer's tool kit, but in order to be sure of the quality of the material, it is worth keeping your own on hand. You can take the FUM tape or anaerobic sealant.
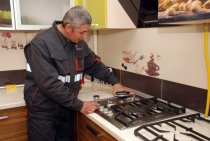
Thus, after studying the information on how to properly connect a new gas stove, as well as acquiring all the necessary fixtures and materials, everything is ready for the visit of a gas master.
We recommend watching a training video about the rules for connecting the stove.