Starting repairs in the apartment, you probably want to get the maximum result. Therefore, do not neglect such an important point as priming the walls before wallpapering. As real masters say, relying on long experience, it is necessary to prime before each stage of finishing work. It is this, for many, seemingly insignificant procedure that largely determines the quality and durability of your repair.

So, why prime the walls before wallpapering? Let's briefly summarize the essence:
- Increases adhesion (sticking) between the layers of the base - brick, plaster, putty - on which the wallpaper is held, preventing these layers from cracking and breaking down prematurely.
- Prevents moisture penetration into the base. The primer acts as a film that prevents the absorption of water from wallpaper glue, moisture from the air.
- The primer removes dust from the surface, seals cracks and pores, which is important for high-quality wallpapering.
- The wall is protected by special types of primers from mold and fungi, pests and insects that can start under the wallpaper.
- Finally, money is saved because less wallpaper paste is used.

It is absolutely necessary to prime the walls before sticking heavy vinyl and non-woven wallpaper: the primer will strengthen the base, increase adhesion and prevent the glue, which in the case of non-woven material is applied directly to the wall, from soaking into the base.
Choosing a primer for walls
Work starts with primer selection. The question arises: how to prime the walls in the apartment before wallpapering? Previously, craftsmen could process the walls before wallpapering with ordinary PVA glue or wallpaper glue diluted in water. And until now, unscrupulous manufacturers under the guise of a primer in solid containers sell such goods. This wall treatment option is acceptable, but in this case, you can dilute the glue yourself, and not buy a product that is definitely not worth the money for which it is offered.
If you want to use a specialized primer, you should purchase a certified product, in a container where the name of the manufacturer, composition, characteristics, and shelf life are clearly and clearly indicated on the label. It is better to spend a little more than to end up with a poorly finished coating.

The following types of adhesive primers should be distinguished:
- Acrylic.
- Alkyd.
- Glyphthalic.
- Mineral.
A family of acrylic primers designed for most types of surfaces, including concrete, brick, wood, plaster and putty. They dry quickly, do not have a strong odor, and are best suited for drywall. Depending on the material of the wall surface, you can choose:
[smartcontrol_youtube_shortcode key="select wall primer" cnt="4" col="2" shls="true"]- universal primer;
- ordinary;
- deep penetration composition.
Alkyd primers fit better on wooden surfaces, glyptal primers are designed for metal, and mineral primers containing cement and lime are best suited for concrete and foam concrete.
Also, wallpaper glue mixed in a certain proportion is used to prime the walls, but here one should strictly adhere to the recommended instructions indicated on the package, and take only products from well-known manufacturers.

Advice. Choose a primer that matches the type of substrate and the type of wallpaper paste being applied to the primed surface. The ideal option would be to use materials from one manufacturer or at least strictly follow its recommendations.
Preparatory work
Priming the walls in the apartment under the wallpaper with your own hands is a simple process that everyone can do. But this does not mean that the matter can be approached carelessly. All stages of work, including preparatory, must be carried out in strict sequence.
- The repaired premises are completely freed from construction debris.
- The surface of the walls is carefully examined. Removing old wallpaper, plasters, nails, screws are removed. Cracks and chips are covered with fresh putty. It must be remembered that the primer is applied only on a dried base.
- You should pay attention to dampness and mold, which could appear in a damp room. Such places should be well cleaned with a chlorine solution, and a primer should be used containing a fungicide.
Do not neglect safety measures: the primer mixes contain chemical compounds that can cause allergic reactions, although the manufacturer claims on the packaging that the product is completely environmentally safe. Use a respirator or gauze bandage, goggles, headgear, gloves and clothing that covers unprotected skin areas in your work.

- With warm water, wash off dust and the smallest dirt from the wall remaining after processing.
Important! The primer should not be applied at a room temperature below +5 degrees, especially on a frozen surface.
Getting Started
The following tools should be on hand:
- Bucket.
- Paint bath.
- Wide roller with a long handle.
- Brush.
Pour the primer into the bucket and mix thoroughly. If the mixture is concentrated, dilute it with water to the desired condition, following the instructions on the label, taking into account your type of wall. The first layer (and there will be at least two of them) is diluted thinner so that the solution is absorbed deeper into the wall and firmly binds the surface to be treated.

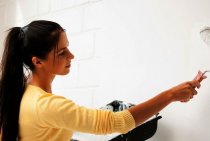
Now you can start priming the walls before wallpapering.
- Pour the resulting solution into the bath, take the roller and carefully, without splashing, dip it into the dishes, then slightly squeeze the pile of the roller on the corrugated edge, so the primer is spent more economically.
- We start processing from the bottom, leaving about 5 cm to the edge of the floor so that accidental dust does not get on the pile of the roller: it will significantly worsen the quality of the coating. Then with a brush it will be possible to carefully process this part.
- How to prime the walls under the wallpaper so that there are no gaps? It is more convenient to start from the corner, so it is easier to control the density of application. Without excessive effort, pressing on the roller, we go from the bottom up. So the primer drops do not flow down the wall to the floor. Several times we carry out with a roller from the bottom to the ceiling, making sure that the surface is well wetted and the primer layer lies evenly.
- So, stroke after stroke, we pass the entire surface, marking the surface to be treated with a noticeable darkening from moisture. This will correctly indicate a properly primed wall.
- When the main space is treated with a roller, hard-to-reach places remain, such as corners between wall and floor, wall and ceiling, various ledges, areas near sockets and switches. Here, carefully apply the primer with a brush, observing the precautionary measures.
- Let the wall dry for 2-3 hours.
You can see all the stages of work in more detail on the video.
[smartcontrol_youtube_shortcode key="how to properly prime walls" cnt="4" col="2" shls="true"]Note: another way to apply a primer is to use a spray gun. Pros: ease of execution and material savings. The solution does not spread, it is applied in doses. Cons: Overspray over the entire area of the walls. The smallest suspension will be in the air for a long time throughout the apartment and you will have to carefully ventilate the room several times.

The final stage of priming the walls
The second coat of primer is applied with a more concentrated and thicker solution.The whole process is carried out in the same sequence. Since the base has already been strengthened and waterproofed with the first layer, for the second one, instead of a primer, you can safely use wallpaper paste in a more liquid state than for gluing.
At the end of the priming work, when the wall dries well, you can start pasting it with new beautiful wallpaper.

little trick
To make sure the quality of the applied primer, professionals drip water onto the wall: if the drop flows down the wall and does not spread like a stain, then everything was done correctly.
You can understand all the intricacies of the process by watching a video on how to properly prime the walls before wallpapering.
It is important to remember that it is necessary to apply a primer before each stage of finishing work, whether it is applying plaster or wallpapering.