Types of toilets
Models
It is important to choose a suitable toilet, it also depends on what tools and additional building materials will be needed during work. Toilet bowls are suspended and floor type
Most often choose traditional floor plumbing
Toilet bowls are suspended and floor type. Most often choose traditional outdoor plumbing.
Hanging-type toilets are attached to the wall, and seem to hang in the air. In fact, plumbing is attached to a special frame made of steel, can withstand a person weighing 400 kg.
Toilet bowls with hanging bowls are attached to the wall with anchor bolts. The free space under the bowl is used for practical purposes.
Release types
Knowing the nuances of the direction of release is an important element when replacing plumbing yourself. The outlet can be oblique or at an angle relative to the floor up to 45 degrees, vertical and horizontal (straight) and vario. The vario type is considered universal, similar to the horizontal one, the pipe length is shorter, it is convenient to use a corrugation when connecting the toilet bowl to the water supply. Direct release is considered more common, when the toilet bowl is connected to the pipe at the same level. Release at an angle is especially common in Khrushchev. Installation of toilet bowls with a vertical outlet is possible only in a country house, communication elements are mounted in the ceilings between floors. The selection of the correct toilet outlet facilitates easy and correct installation.
Reasons for replacing a toilet
Some breakdowns can be repaired without replacing plumbing. But there are types of breakdowns when only replacement is necessary.
Various kinds of water leaks from the toilet bowl lead to uneconomical costs of the water resource, an increase in utility bills for water. If water floods the floor, and the pipe elements are in order, then a crack has appeared in the plumbing. You can repair the toilet, the replacement process can be postponed for a while. If water flows from the barrel along the back wall of the bowl, then the connections can be repaired. In this case, the old valve must be replaced; the internal device for the tank can be bought at any specialized store.
 The material from which toilet bowls are made is susceptible to large temperature differences, and can cause cracks in the enameled surface. A toilet covered with cracks can completely collapse over time. In this case, it is better not to hesitate to replace the toilet, without waiting for its sudden break.
It happens that the toilet is broken, the only way out is to replace the plumbing with a new one.
An alarming sign is the appearance of a toxic smell from the toilet. It is necessary to check the correct slope angle of the sewer pipe, possibly due to improper pipe laying, waste products leave sediment on the pipe walls. If the reason is not in violation of building codes for laying pipes, then the reason may lie in violation of the integrity of the ceramic coating. When the enamel is corroded, wastewater, upon contact with the porous structure of the sanitary ware, is absorbed inside and exudes a stench. It will not be possible to eliminate the defect, you will have to replace the plumbing.
In an apartment where the toilet is constantly used, the replacement must be done promptly. To do this, another toilet bowl is bathed in advance, it is also necessary to prepare tools and the necessary building materials.
Toilet installation process
In addition to the above tools and materials for installing a new toilet, you will need plastic pipes, more practical with thick walls. The junction of the cast-iron and plastic pipes is considered dangerous, since a leaky connection will certainly lead to a leak.It is necessary to thoroughly clean the cast-iron socket from rust, dirty deposits, wipe it with a solution to degrease the surface.
The next step is to assemble plastic pipes, for this it is necessary to cut pipes of a certain length, taking into account that 4 cm of the pipe will be inserted into the socket. The ends of the pipes that are not inserted into the sockets must be chamfered so as not to cut the rings during installation. This procedure can be done with a regular knife. For easier insertion of the pipe into the sockets, it is better to lubricate the rubber rings with silicone grease. First, the prepared pipe is inserted into the cast iron pipe, then you need to insert the pipes into each other, like a designer.
Attention! If the bolts are overtightened, the toilet seat may crack. We insert the corrugation into the tee, pre-lubricated with sealant, and after connecting the toilet, you can put it on the place marked on the floor
Be sure to check the level of the toilet, if there are distortions, then add chips for leveling. The perimeter of the base must be treated with a sealant, lifting the plumbing a little up so that water particles do not get under the sole. We screw in the bolts, wipe the unnecessary sealant with a rag. The toilet should also be checked for leaks, flush several buckets of water into it. We attach the tank, instructions for action are always attached to the details. We turn on the water to check the operation of the tank and the absence of its flow. At this stage, you can adjust the water intake system if you do not need a whole tank to be filled. By screwing the board to the toilet and attaching the cistern lid, the toilet is ready for use.
We insert the corrugation into the tee, pre-lubricated with sealant, and after connecting the toilet, you can put it on the place marked on the floor. Be sure to check the level of the toilet, if there are distortions, then add chips for leveling. The perimeter of the base must be treated with a sealant, lifting the plumbing a little up so that water particles do not get under the sole. We screw in the bolts, wipe the unnecessary sealant with a rag. The toilet should also be checked for leaks, flush several buckets of water into it. We attach the tank, instructions for action are always attached to the details. We turn on the water to check the operation of the tank and the absence of its flow. At this stage, you can adjust the water intake system if you do not need a whole tank to be filled. After screwing the board to the toilet and attaching the cistern lid, the toilet is ready for use.
How to install a toilet on a tile.
Often we are asked: "Is it possible to install a toilet on a tile?". Yes, you can. But this task is not an easy one and, depending on the chosen technique, requires due professionalism or time.
We will describe several ways in which a toilet bowl is traditionally installed on a tiled floor. And you yourself choose the most suitable for yourself.
To get started, you should stock up on the following materials and tools (some of them may not be needed, depending on the chosen method of installing the toilet on the tile):
- corrugated pipe; - flexible hose for conducting cold water to the toilet; - ball valve to control the access of water to the toilet; - drills for concrete and ceramic tiles; - drill or perforator; - adjustable wrench; - screwdrivers; - hammer; - pencil ;- core.
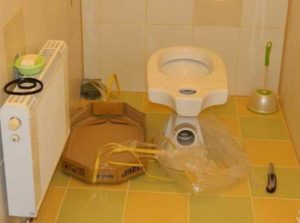
Stage 1 preparatory work
Before you remove the old toilet, you will need to prepare the work area. You will need to remove the shelves and rugs from the bathroom. In addition, you need to take out all those objects and things that will block the space. After all, if you leave them, then it will be inconvenient to dismantle the old plumbing. In addition, in the course of such work, it is possible to inadvertently touch fragile objects, as a result, they will break.
After that, bring the following tools and materials to the workplace:
- hammer;
- wrench;
- chisel;
- glasses;
- basin;
- hacksaw for metal;
- scrap;
- pliers;
- latex gloves;
- rags (rags).
Next, you need to turn off the water on the riser, and then drain all the liquid that has accumulated in the tank. After that, you can carry out the removal of the old toilet, that is, proceed to the next stage of the work.