Criterias of choice
If the composter model and type are defined by the user, then it remains to choose:
- manufacturing material. Composters can be made:
- from plastic. Plastic models are lightweight, easy to install, use and maintain, low cost, durability;
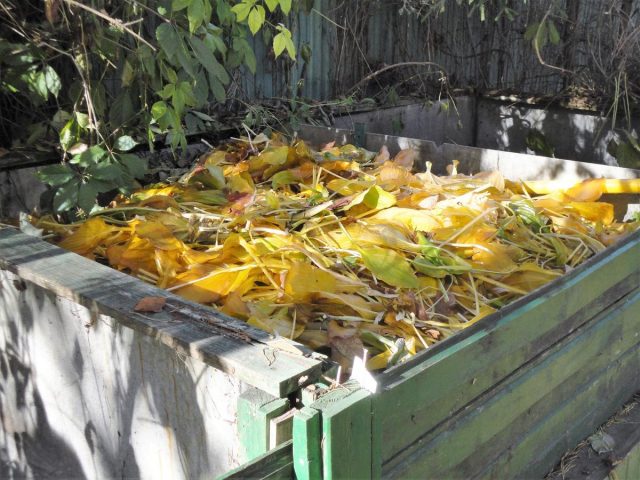
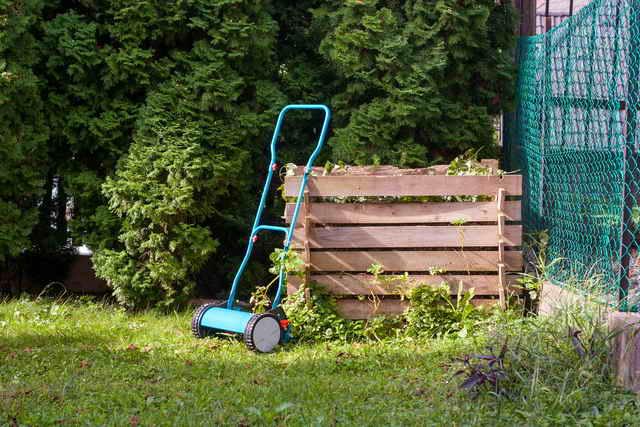
- from wood. Wooden containers are more aesthetic and environmentally friendly. However, a short service life, especially with improper care, and a higher cost reduce the level of demand for these structures. As a rule, do-it-yourself composters are made from this material, since wood is easier to process;
Wooden compost tank
from metal. Metal containers are distinguished by their high cost, but also the longest period of use.
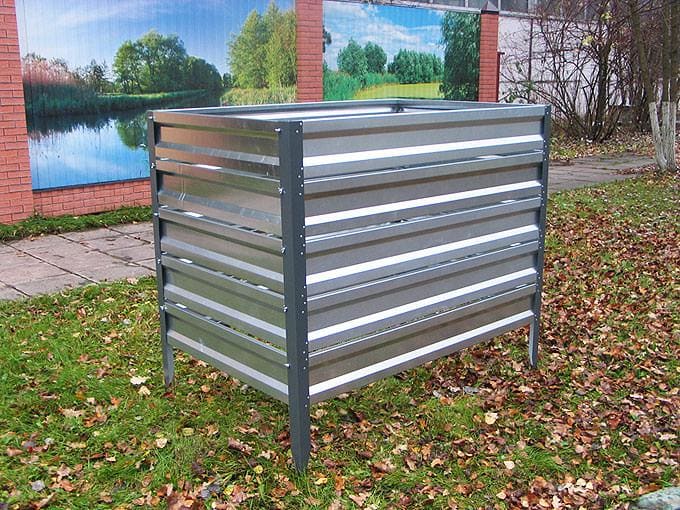
Metal compost tank
container volume. The parameter will be determined depending on the size of the site, seasonality of use and user priorities. Some gardeners prefer to install several containers of small capacity in the country, others - one, but large. The most popular are composters with a capacity of 600 liters and 800 liters;
inlet and outlet dimensions
For ease of use, it is important that the gardener can freely place, for example, large armfuls of mowed grass in the composter and take out the finished fertilizer with a pitchfork or shovel;
the presence of additional elements. For example, the presence of a metal mesh installed at the bottom of the tank is essential, as it prevents rodents from entering the composter and, as a result, from eating the substances to be processed.
Important nuances of composting
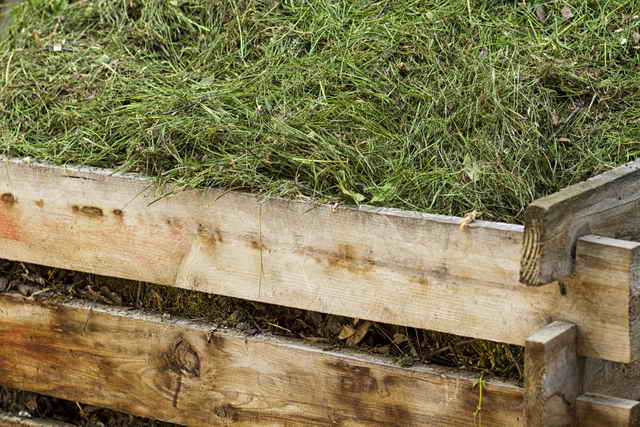
The compost is laid horizontally in even layers. Periodically, these layers are mixed with manure. They are laid without tamping, so as not to block the access of air and not to interfere with the work of the bacteria responsible for the formation of fertilizer.
Do not allow this mass to dry out, water it periodically with water, especially during the dry season. And it is impossible to overmoisten what is contained in the box, because in this case the necessary bacteria may die.
It is necessary to water the resulting compote of EM (effective microorganisms) with preparations more than once a season. Do not empty the entire vial into the box. Such a bottle (0.5 liters) must be divided into five buckets of water, and 100 grams of candied jam should be added to each of them. This sweet supplement will come in handy in order for the bacteria to start working.
Let these buckets stand for some time, then pour this liquid evenly onto the compost. The effect of this technique has been proven - the fertilizer ripens much faster.
How to build a compost bin do-it-yourself assembly
Generally speaking, the manufacturing process compost bin in the country with their own hands is not so difficult. It can be presented in the form of the following sequence of works.
-
We remake pallets and make shields from them. It will take a complete disassembly of the source material (pallet) - it needs to be divided into boards and bars, re-arranged a little and everything is reassembled. The beam must be moved to the very edge of the shields, and the distance between the board should be reduced to a maximum of 20 mm - gaps are needed, since the process of grass decay requires oxygen. It is also necessary to think about the installation of shields - the boards should not reach the bottom of the beam by about 300-400mm. Thus, the useful height of the compost box will be approximately 600-700mm - if this is not enough for you, then the beam will have to be specially purchased and assembled with the help of shields of the height you need. There are three such shields to collect.
- We install the shields in the pits and connect them at the top with other boards from the pallet.We connect them so far only along the perimeter, after which we fill up the pits and at the same time carefully tamp the soil, spilling it with water.
3. The next stage of work that will need to be done in the process of solving the question of how to make a compost box with your own hands is the design of the box on the back side - in fact, here you will need to fill the board in the same way as it was already done in the process of making shields. Only the back wall of the box is done this way, the front is made out a little differently. -
Before - it must be removable. Otherwise, getting compost out of it will be inconvenient. For this purpose, you will need trim profiles for UD drywall - they are sewn on a little at an angle. The result should be some kind of blinds, the slats of which are inserted into the ud profiles - when the need arises, one or two boards can always be removed and at the same time you can get free access to the compost. Alternatively, such blinds can not be made along the entire height of the box - it will be enough to build them in the lower half, and assemble the upper part according to the principle of the sides and back wall.
In principle, this is the whole correct compost bin. The only thing that can be added here is to build a lid, which will turn out to be a very useful addition - at least a compost bin equipped with a lid looks aesthetically pleasing. You yourself understand that without it it will be an ordinary pile of garbage, even though it is folded into a wooden box. This is optional - if you don't want a lid, so be it.
And in conclusion, the topic of how a compost pit is made with your own hands, I will say a few words about finished products of this type. If time does not allow to build such a structure on your own, almost exactly the same box can be purchased at a hardware store. At the same time, it will cost twenty times more - when making a box with your own hands, all you need to purchase is self-tapping screws and antiseptic protection for wood. Everything else can be obtained absolutely free.
Location selection
A number of conditions must be met
It is very important to decide on a place. We do not recommend organizing a compost bin too close to a house or other residential area, at the very entrance to the site or near entry roads, etc.
However, everything can be seen. The owner will explain this by saying that he does not want any particular place to disappear. In fact, it is recommended to organize the box in a secluded place, for example, in the corner of the site, in the shade, and not in the sun (the compost does not need to dry much).
It is also necessary to make it convenient to approach the compost bin, for example, to make an ordinary path, because you will have to go there all the time (with weeds and buckets of unnecessary waste from the kitchen). In front of the box itself, it is desirable to make a platform with bricks so that it is possible to approach with a cart when it is time to pick up the compost.
 Space for a compost bin. The illustration for the article is used under the standard license ofazende.ru
Slate box
The most inexpensive and reliable box can be made from slate, because it does not rot. It can be used to make back and side walls, as well as partitions. It is recommended to reinforce the slate with boards so that it does not crack due to overcrowding.
The front of the box is best built completely from boards (the front wall is constructed on the basis that the finished fertilizer could be conveniently taken out of the box). At half height, the front part can be made standard, and then dialed from boards that lie exactly horizontally. The boards are fastened in such a way that it is possible to remove them to the required level. You will understand how convenient it is when you take out the finished fertilizer.
 Shiver option
Overview of popular models
Based on consumer reviews, experts compiled a rating of composters.The most popular products are made by:
Finnish company Kekilla.
The plastic composter of the Globe model is made of qualitative material which is not exposed to negative impact of direct sunshine and negative temperatures.
The design of the tank does not have sharp corners, which is important in the presence of small children. If necessary, the container can be supplemented with separate rings to increase the volume;
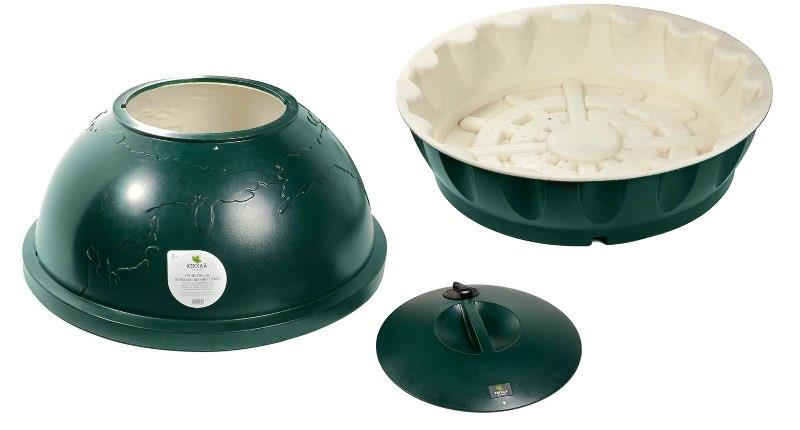
Finnish model 160 l
Graf Thermo King (Germany).
The body of the container is made of foamed plastic, which is not exposed to the negative effects of ultraviolet rays, and will also keep the temperature perfectly.
The user of the equipment can independently choose the mode of operation, in accordance with the time of year. A nice addition is the design of the structure. The composter can be installed in any part of the garden as a decorative element;
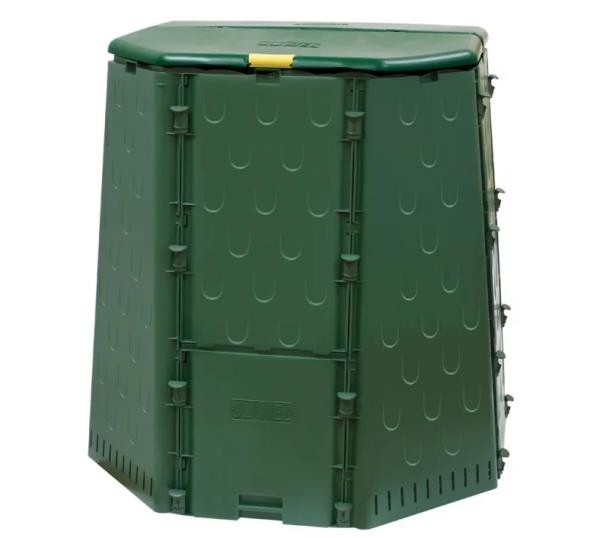
Compost bin from a German company
Russian company "Volnusha".
The container, made in the shape of a cone with wavy ribs, is made from propylene, resistant to low and high temperatures, as well as chemical reactions.
The composter is not equipped with a bottom, so you need to additionally purchase or make your own bottom net that protects against rats and mice.
The container is convenient for laying waste and taking out compost. The only negative is that the top cover of the container opens when exposed to strong winds.
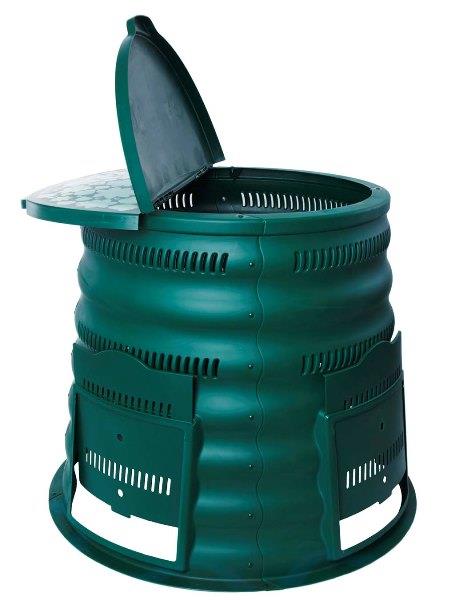
Russian Volnusha cone shape
The description of the composter "Volnusha" is presented in the video.
To obtain high-quality compost, it is important to install the composter on the ground (without any substrate) and in the shadow sector. Additionally, regular mixing of waste and watering in dry weather is required.
For the winter period, it is recommended to transfer the container to a special mode of operation (if such a function is available), wrap it with insulating materials or remove it.
The principle of operation of the summer option
In order to get organic fertilizer can be used:
- Fallen leaves
- cut grass
- Food waste
- Feces
But for the proper course of the process, such a container as a composter is needed. It should have holes to remove excess moisture and allow air to enter the collected mass.
Watch the video, expert advice, the principle of operation:
Moreover, the laying of waste should be done in layers, each of which must be sprinkled with peat, sawdust or ordinary soil from the site. This is necessary for the development of microorganisms, leading to the decomposition of residues and their transformation into compost.
Cyclic use of compartments
First you can fill one compartment, let the other compartment remain empty. Next spring, when last year's fertilizer melts, throw the top, which has not had time to ripen since autumn, into the second compartment, to the bottom. And during the summer period, put the compost materials there.
But the black substrate, which is already ready (about one second of the first compartment), can be used on the site, so you will gradually free the compartment completely. In the event that during the spring period you do not have time to use all the fertilizer from the first compartment and pull it around the site, do not be lazy to keep supplies in bags, you will need them in the fall.
Such situations are extremely rare. Fertilizer always finds a use. Everything will be repeated again next spring.
 The illustration for the article is used under the standard license ofazende.ru
Optimal dimensions
The dimensions of the compost bin depend on some conditions:
- the size of the area to be cultivated, multiplied by your efforts to maintain order;
- the number of people using the site.
If this is a large family with regular guests, this is one thing, completely different, if this is an old retired grandmother. The amount of kitchen waste directly depends on this indicator.
The amount of time spent in the country (all summer or come only on weekends).
We advise you to be guided by these conditions when designing your box. The height is its constant value (should be no more than one and a half meters). At higher altitudes, the composting process may be slower.
Inside the compost bin, it is recommended to divide it into at least two compartments. It is proved that the third section will also be useful, it will be useful for storing compost.
A box that has only one compartment will not be convenient anyway. You will get fertilizer from such a box only after a couple of years, when it is already completely ready. From a box in which there are two sections, fertilizer can be obtained every year in an uninterrupted cycle.
 The illustration for the article is used under the standard license ofazende.ru
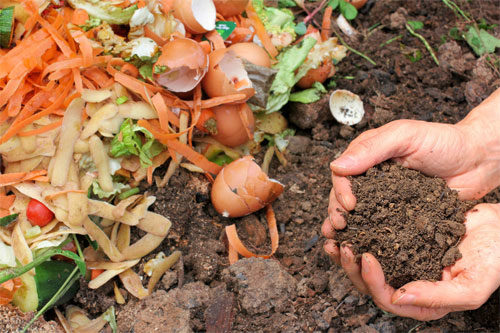
What is and where it is applied
Modern bio-waste processing facilities tend to be very aesthetically pleasing and also provide optimal conditions for composting. Usually they are made of plastic in the form of boxes or barrels, and some models can be used even in winter. There are also metal structures painted with powder paint that is resistant to fading in the sun.

Standard compost device
Although these dacha products differ in many ways, they have the same function - it is the processing of waste into a nutrient mixture. Moreover, they are equally well suited for processing food and plant residues, as well as waste from dry closets, making the composting process efficient and environmentally friendly.
Compost bin options
Waste can be piled on a pile or buried in a pit. Options that do not require material costs. Take a shovel as your assistant and the "capacity" is ready. But, this option is only suitable for the first time. It is best to make a box that will hide the contents of the pile from the eyes, which, you see, is not aesthetically pleasing.
compost box
Some use factory-made plastic or metal compost bins. Others have adapted to store waste in barrels with holes drilled for air access. But, with a little effort, you can knock down a compost box from the boards with your own hands. But, first, consider the requirements for homemade boxes.
What should be a compost bin
In the manufacture of boxes for maturation of compost, the following requirements are taken into account.
- The need for an influx of oxygen, which will provide ventilation holes on the sides.
- To prevent precipitation (rain, snow) from washing useful substances into the soil, make a cover. This will preserve the value of compost-biofertilizer.
- Some summer residents cover the box with a film, having previously fixed it. But this is not always convenient. The cover can be blown away by the wind. Yes, and this box looks unfinished.
- Given that the bottom layer of compost matures earlier, it needs free access.
Pay attention to the diagram of a simple standard compost bin. (Rice
1)
Variants of simple boxes-boxes
What size the box will be is up to you. They knock down a two-section structure, as a variant of the compost bin, where the front boards are also removable. (Fig. 2)
Another solution to the problem will be a simple opening design, on which rubber strips are used instead of loops on the boards. They are also made from any elastic material. (Fig. 3)
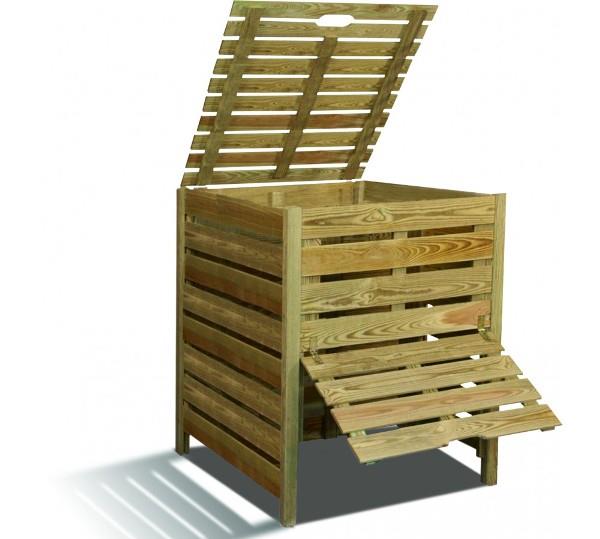
Economical project: compost bin made from wooden pallets. (Fig. 4)
If you are interested in the idea of building a summer cottage, let's build a functional greenhouse together using the Mitlider method.
Making a compost bin with your own hands
If you have time and money, the issue of a compost bin on a personal plot can be approached thoroughly. We make a 3-section compost bin with our own hands in stages.
The first stage - columns
We prepare columns - 8 pieces. The lower part, located in the ground, is treated with fuel oil, drying oil, motor oil or tar.
You can dig all eight (4x4). If possible, attach 4 posts to the fence for the back of the box. The process will be simplified, you do not need to dig four holes under the supports. (Fig. 5)
The second stage is the preparation of the boards
The compost bin decomposes organic materials. Wood is one of them. Therefore, the boards must be treated with non-toxic agents - these are special deep penetration impregnations. They will protect the wooden structure from moisture, decay, insects. Protective drugs can be bought at hardware stores.
When the boards are processed, we proceed to their coloring. We are waiting for the first layer to dry, and only then apply the second. This procedure will protect the paint from precipitation and temperature changes.
The third stage - partitions
We nail the prepared boards so that there is a gap between them for ventilation. The front part, we sheathe to half the height. This will give us the opportunity to equip two compartments with doors. (Fig.5)
One board is nailed down in the third compartment, a large door is installed there. (Fig. 6)
Fourth stage - cover
We reinforce the upper end parts of the partitions with the crossbars, the front wall from the back.
We hang the cover-doors on the hinges. We also equip the front of the box with three doors: 2 small, 1 large.
For convenience, we fix the latches and handles. The compost bin is ready.
Video tutorial on making a compost bin
We have not introduced you to all the options for compost bins. But the essence is the same - to make your valuable fertilizer from properly prepared compost.
By following the recommendations, you will succeed in this matter.
How to start making compost pits
Pits should be located as far as possible from residential buildings and located on the leeward side, since organic waste has an unpleasant look and smell. The recommended distance is at least 30 m from the dwelling.

Do not place pits close to sources of drinking water. The optimal distance is 25 meters.
Consider terrain features. It is impossible to place pits on hills: together with precipitation, its contents will be carried around the site. You should not choose places on the slopes: excess water reduces the rate of fermentation. A flat piece of land is best.

Pay attention to the trees next to the pits. Alder and birch will become a good neighborhood, but it is better not to put pits next to evergreen trees.

To maintain the correct moisture content of the compost, select a site in the shade.

Keep in mind the ease of access to the pit and choose the most suitable location for you.

Capital structure options
To build a box, you will need new thick boards. Compost is created by bacteria that digest waste, this is an aggressive environment for any organic matter (the boards with which the box is built can decompose). That is why the boards must be chosen reliable, treated with a special compound from decay, you can paint them well.
Between the boards it is necessary to leave gaps, the width of which should be several centimeters. This is necessary so that the compost can get enough air, this is a must!
 Compost bin option. The illustration for the article is used under the standard license ofazende.ru
Design choice
Before proceeding with production, it is necessary to determine:
- construction;
- dimensions;
- manufacturing material.
Varieties by type
How to make a compost bin with your own hands? The following manufacturing options are available:
- single-section (picture above). The simplest design, characterized by small size and minimal cost. Can be made from various materials.A significant disadvantage is the impossibility of continuous production of biofertilizer, since with the constant addition of waste to the pit, processing will go much slower;
- two- and three-section. More convenient designs that allow you to lay waste gradually and get ready-made compost annually. Crafting requires more materials and time;
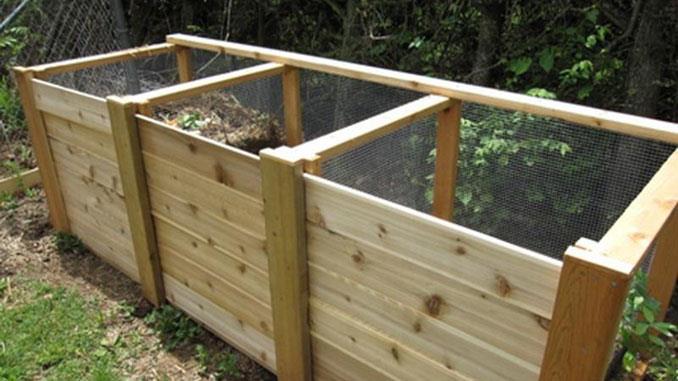
Design with three separate chambers
barrel boxes. The designs are notable for their small size and the impossibility of continuous production of fertilizer, but the increased speed of composting and a more interesting appearance attract a large number of gardeners.
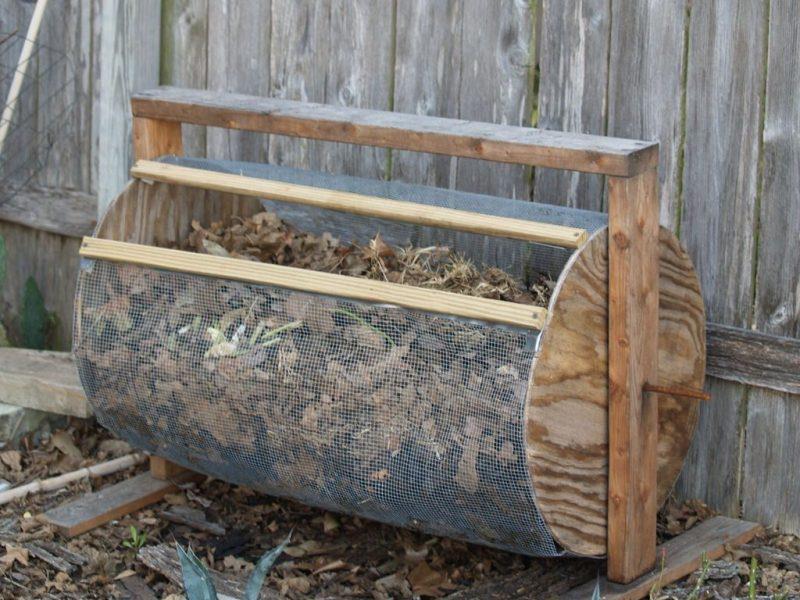
compost barrel
The compost heap box can be:
- open type. Such designs are easy to manufacture, but they have a high probability of spreading unpleasant odors, like from a cesspool;
- closed type (supplemented with a top cover). The almost complete absence of odors, the possibility of additional decoration are the positive aspects of this design. But for self-production, more materials and time are required, respectively.
Open-type boxes are made and installed on large areas, as they are large in volume. Closed structures are recommended for use in small summer cottages, which additionally solves the problem of lack of free space.
Sizing
After choosing the design of the composter, it is required to determine its dimensions. When choosing dimensions, consider:
- plot dimensions;
- the amount of waste to be recycled;
- sanitary norms and rules for the location of the compost heap.
In accordance with the rules, the composter must be installed at least:
- 10 m from a residential building, which will eliminate the possibility of the spread of odors;
- 25 m from natural reservoirs located on the site or near it;
- 50 m from the source of water supply of the site;
- 5 m from the road, neighbor's fence, toilet or summer shower.
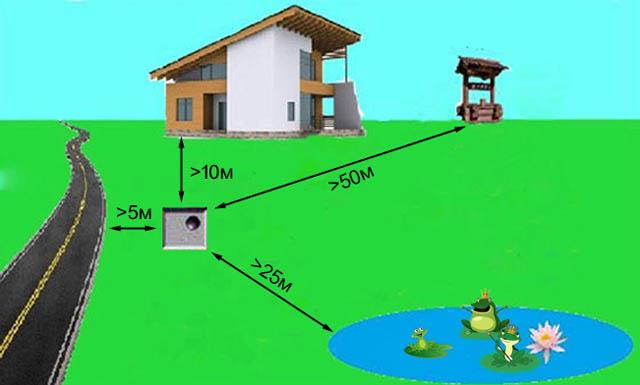
Rules for choosing a location
Manufacturing materials
The materials used for manufacturing can be:
- wooden boards or pallets (wooden pallets). A box made of wood will be environmentally friendly, pleasant to look at, and with proper wood processing and durable;
- slate. The material is durable, but it will not work to achieve an aesthetic appearance of the structure;
- metal sheets or barrels. The metal is known for its strength and durability, but also for its higher cost;
- concrete and concrete rings. Concrete is the most durable, but the large weight of the structure does not allow manufacturing and installation without the help of special equipment. In addition, the choice of this material is limited by the high price;
- plastic barrels or panels. Plastic boxes can fully comply with the landscape design and do not stand out against the background of trees, shrubs and other plantings. However, when exposed to sunlight, exposure to chemicals or low temperatures, plastic can be deformed, which reduces the life of the structure;
- brick. The material is expensive and rarely used for compost pits;
- metal grid;
- corrugated board and so on, that is, it is possible to make a box for obtaining compost from any materials available.
Varieties of composters
The first thing to determine before choosing is the type of equipment. There are different types and models of tanks.
Model types
Modern composters are divided into two main types:
- open tanks;
- closed containers.
Open composters are different:
- low cost;
- light weight, which allows you to move the container from one area to another and clean it for the winter;
- large collection capacity.
The only significant disadvantage is the possibility of spreading an unpleasant odor (similar to a cesspool), resulting from the decomposition of organic matter.
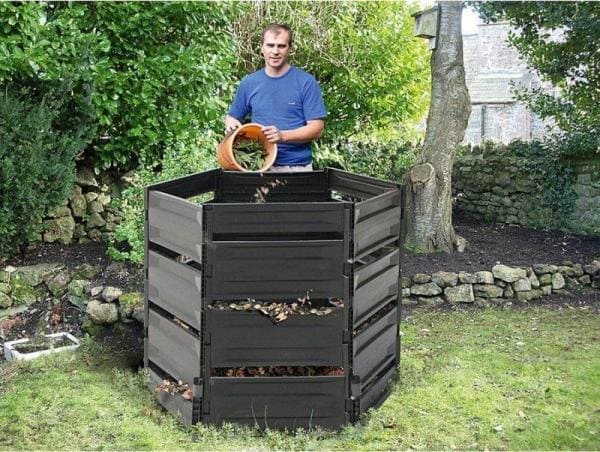
The simplest open compost tank
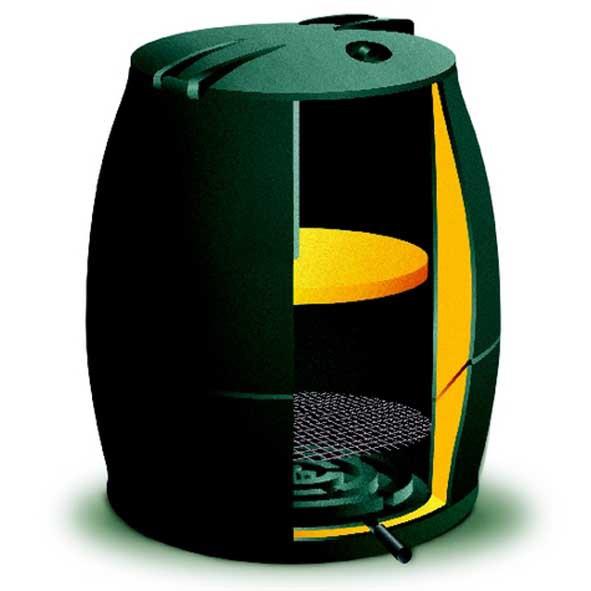
A closed composter (a fairly airtight container equipped with a lid) is distinguished by:
- small volume. On average, manufacturers produce closed containers with a capacity of 200 - 1000 liters;
- the possibility of obtaining compost in a shorter time, since under the influence of temperature, waste processing is much faster;
- the possibility of year-round use.
The negative aspect when choosing a closed type composter is the higher price compared to the previous type.
Container with a lid for quick composting
Open-type composters are recommended to be purchased if there is a garden plot with a large area and a large number of plantings. The closed type is optimally suited for summer cottages of sizes 4 - 6 acres.
composter models
Manufacturers produce the following models of composters, which differ in appearance and technical parameters:
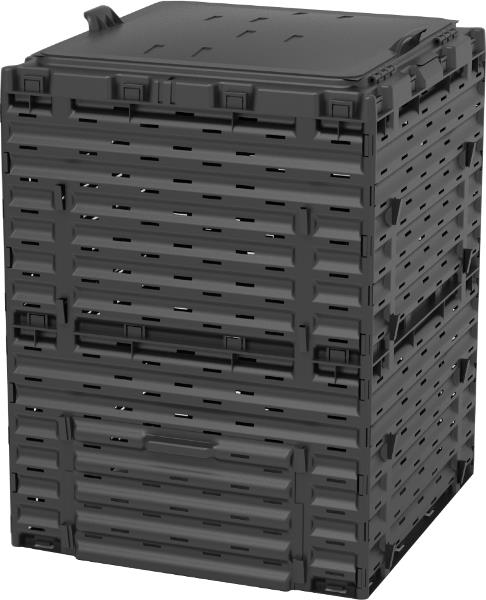
- composters-boxes (picture above). The simplest and most convenient model, characterized by ease of assembly and use. The garden compost bin can be made open or closed;
- thermal composter. The device is characterized by the presence of a sealed and insulated housing and can be used all year round. Due to the long-term preservation of heat, the process of decomposition of organic waste occurs several times faster than in boxes. Another plus is the absence of odors. The thermal composter can be made in the form of a hemisphere or a barrel;
Product type with insulated housing
vermicomposter. An improved model of the composter, in which the process of processing organic matter occurs due to worms (another name is worm). The principle of operation of the device is as follows: waste and worms are placed in the first tray. As compost is obtained, a second and so on trays are added, into which the worms gradually move.
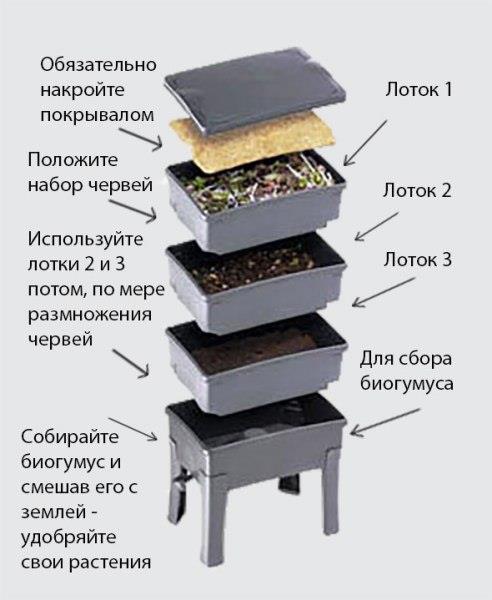
Tray type with worms
A vermicomposter is the only device that can be installed not only in a summer cottage, but also indoors (on a balcony, veranda, and so on), which allows you to get natural organic fertilizer all year round.