During the overhaul of apartments, an important role is played by wall decoration. It has not only an aesthetic, but also a practical purpose - leveling the surface. This process can be done with both plaster and drywall. There are several options for doing this job: wireframe method using a profile or wooden beam and frameless method using glue. Each of these options deserves special attention and has both positive and negative sides. Those who decide to make repairs with their own hands with minimal time and effort will certainly be interested in the method of finishing the walls with drywall without using a frame and a profile.

In order for the repair not to be delayed, and the result of its implementation to be positive, you just need to follow a number of simple rules and stock up on the necessary tools.
Tool preparation
Such a simple inventory must be prepared before starting work:
- Impact drill or puncher with a nozzle.
- Spatula 100 mm wide.
- Hammer.
- Roulette 3 and 10 meters.
- Construction pencil.
- Stationery knife with a set of blades.
- Rule 2.5-3 meters.
- Level 80 cm.
- Plumb.
- Bucket plastic 10 l.
- Brush-brush.
- Flat rail 0.5 meters long.
- Rubber mallet.
- Chopping cord.
Finishing material must be purchased after all measurements have been completed, since only after measurements have been taken will the exact amount required be known.

Marking and measurements
Like any other work, wall cladding with drywall requires accurate measurements and does not tolerate haste. Regardless of whether you are doing repairs in an old apartment or a new building, you first need to check the diagonals of the room where the walls will be lined.
It is the measurement of the diagonals that allows you to find out how correct the perimeter of the room is: it has the shape of a rectangle with angles equal to 90 degrees, or a trapezoid with acute and obtuse angles.
In order to find out this, it is necessary to measure the distance between two diagonally opposite corners, write down the length. Then repeat the same procedure with the two remaining corners. The length of the two diagonals, as well as the length of the opposite walls, should be the same. This will mean that the room is leveled, and you can move on to the next step.

If the lengths of opposite walls or two diagonals do not match, the following steps must be taken:
- Having measured the length of the walls opposite each other, it is necessary to find out which of them is shorter and write down the minimum size.
- On the wall that is longer, measure this distance and mark with a pencil.
- Repeat the same with the other two walls.
- With the help of a chopping cord, project the perimeter of the room onto the floor, using the marks left on the walls.
- Measure the diagonals again.
After completing the above steps, the diagonals should align. Otherwise, one or two of the sides must be evenly shifted to the side until the diagonals fully match.
When the correct perimeter of the room is drawn on the floor, we draw a vertical level on the wall from each corner drawn with a plumb line. Due to the fact that the top of the wall may be littered into the room, the vertical may not coincide with the angle drawn on the floor. In this case, it will be necessary to shift the drawn perimeter on both sides by the same distance. When all the planes are aligned, you can start measuring.

The distance between the lines drawn on the wall will allow you to determine the required amount of plasterboard, and the distance from the wall to the perimeter drawn on the floor will show how much glue you need to purchase.
Wall preparation
In a new building, the walls do not require special preparation. It is necessary to remove the remains of the solution (if any) from the sheathed surfaces and prime well with a deep penetration primer.
There is a little more work in the old apartments. First of all, you need to remove old wallpaper from the walls with a spatula.This will be easier to do if the wallpaper is pre-wetted with plenty of water using a maklovitsa. After that, you need to check the walls for swelling of the old plaster. This is easy to do by lightly tapping them with a hammer. Sprinkled areas should be well cleaned of dust, and then carefully primed all walls.
Important! To simplify the work, it is recommended to screw screws into the wall, which will play the role of beacons. Screws are screwed to the desired depth in the amount of 6 pieces per sheet. Subsequently, when the drywall is glued to the wall, such beacons will not allow the sheets to warp and sink during their pressing.
If the walls do not require the installation of additional wiring, then you can proceed to their lining.

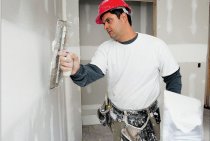
Plasterboard cladding
Having followed all the tips listed above, it will not be difficult for anyone to finish what they started.
What can be used to glue drywall to the wall?
- Suitable for height differences up to 4 mm putty "Knauf Fugen" (or other high-quality gypsum composition), diluted to a creamy consistency, which is applied in an even layer on the entire surface of the drywall sheets or immediately on the wall.
- With differences up to 20 mm, Knauf Perflix glue or its equivalent is used to fix the sheets. It is applied to the wall or drywall with separate cakes, the distance between which should be 30–35 mm.

- If the height difference is greater, the adhesive consumption will be too high. Therefore, to reduce the cost and simplify the process on the wall with glue, GKL trimming is about 10 cm wide. You can use several of these pieces glued on top of each other, their number will depend on the magnitude of the differences.

Drywall adhesive is best applied directly to the wall. Moisture from the adhesive and the weight added by the adhesive can cause the sheet to break during installation.
After applying glue with cakes on the surface of the wall, it is necessary to attach drywall, focusing on the marks on the wall and floor.
Important! Plasterboard sheets are placed on the wall in such a way that cruciform joints are not obtained. In addition, you need to indent from the floor and ceiling and leave gaps of 1–1.5 cm, placing pieces of drywall under the sheets. These gaps are subsequently puttied or covered with skirting boards.

Each sheet of drywall must be checked not only for the vertical level, but also for the general plane, using a long rule. In order for the sheet to become as it should, it is tapped with a rubber mallet. If you use screws as beacons, the job is simplified. After rechecking the evenness of the sheet with the help of a level, you can proceed to the next sheet.
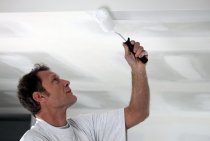
Only after drying (the glue heats up during hardening and heats the gypsum), you can proceed to sealing seams between drywall sheets.
The cost of finishing the walls with drywall
If you have not yet decided whether to finish the walls with drywall without using a frame on your own or contact a specialist, we suggest that you familiarize yourself with the approximate cost of services:
• in Moscow - from 250 rubles. for 1 sq. m;
• in St. Petersburg - from 220 rubles. for 1 sq. m.
In other regions of the country, prices for installing drywall on walls using glue vary greatly.