Having conceived a redecoration or even redevelopment in an apartment, many are faced with the fact that the walls, upon detailed inspection, are not perfectly even. This problem is especially common in newly built apartment buildings. Of course, if there are no deep holes or undulating bumps in the walls, you can not focus on small deviations, but if quality and durability are important to you when repairing your apartment, you need to level the walls. The best option for self-repair would be lighthouse wall alignment.

What are beacons, their advantages and disadvantages
Beacons for leveling walls are long strips of metal or other material that are installed on the surface of the wall with special fasteners or on a plaster mixture. If you are thinking about how to align walls the easiest way, this method will definitely suit you.
Beacons for leveling walls, sold in hardware stores, can be replaced with self-made beacons or other building materials suitable for the intended purpose. For example, these could be:
- smooth metal strips;
- metal pipes;
- rectangular or square profiles;
- lighthouses made of cement or plaster mixture;
- cap screws.

When making beacons on your own, it must be remembered that at high humidity in the room, the metal can rust, and too thin structures can deform. Installing beacons from cement or plaster requires certain skills and takes more time.
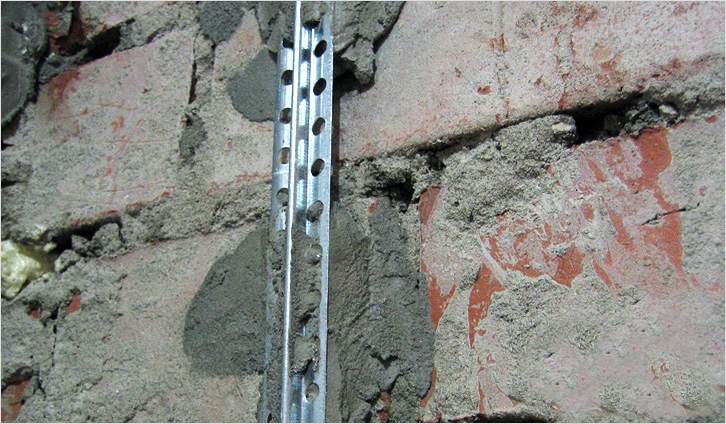
The easiest way is to buy ready-made beacons in a specialized store. They are most convenient to use, as they have perforations - holes for mounting on the wall. These beacons are of two types:
- aluminum;
- galvanized.
The second type of beacons is more durable, and if you leave it under a layer of plaster, you can not be afraid of rusting the metal. However, such products can be deformed not only when working with them, but also during transportation.
When choosing a lighthouse in a store, you should pay attention to its thickness and rigidity. It is best to focus on well-known manufacturers.
Also beacons differ in size:
- in length they can vary from 2.7 to 3 meters;
- in width - from 20 to 22 millimeters;
- in height - from 6 to 10 millimeters.

The larger the beacon in size, the more plaster will be needed.
Preparatory work for leveling walls
Before you start leveling the walls along the lighthouses with plaster, the work surface must be prepared.
First, wallpaper, tiles, paint and any other decorative coating are removed. If the walls are plastered, it will be best peel off the old layer fully. In the case when it is not planned to remove all the plaster, it is necessary to identify and clean loose and swollen places. After that, you need to clean the wall of dust and debris, for this you can use a broom or a vacuum cleaner.
For better adhesion of the coating to the base on the cleaned wall, notches can be made with a hammer and chisel.
If the wall is severely damaged, it has deep depressions or, conversely, bumps, it is necessary to carry out a rough leveling. To do this, you will need plaster, which closes all the recesses, and a hammer to knock down convex sections. Before applying a layer of plaster to the wall, this place is treated with a primer.
Some primer mixes are dyed in a specific color, which helps to cover the wall without missing sections.
After rough leveling, the wall should be cleaned of dust again, and then completely covered with a primer layer. This is done in order to ensure better adhesion of the plaster to the wall surface and protect it from moisture.

Fastening metal beacons to the wall
Aligning walls with lighthouses is a simple task in itself. The main thing is to do it right fastening beacons to the wall. For metal beacons, this can be done in two ways:
- With the help of special beacon fasteners.
- Fix the beacons with cement or gypsum mortar.
Method one: fixing with fasteners
In the first case, it is necessary to apply markings in the form of vertical lines at a distance of about 100 centimeters from each other.
- The first and last lines should be at a distance of 20 centimeters from the edge of the wall. To make the markings even, you need to use a building level or a plumb line.
- On the extreme lines, you need to drill holes at a distance of about 30 centimeters from each other and 8 millimeters deep. The diameter of the holes must match the diameter of the dowels installed in them.
- Self-tapping screws are screwed into the holes, and not all the way, which in the future allows you to set the level as you need. Beacon mounts are put on self-tapping screws aligned at one level.
Before installing beacons, you need to make sure that there are no significant deviations in the layout and height of the screws.
- On both sides, along the extreme markings, two beacons are installed on the wall.
- A rope is stretched between them, with the help of which you can see all the irregularities of the wall.
- The remaining beacons are attached in the same way.
Aligning the walls along the lighthouses with your own hands using this method makes it easy to adjust the thickness of the plaster layer.

Method two: use a solution
The second method is not too complicated in theory, but certain skills are required for its practical application. In order to install beacons on the solution, you will need:
- gypsum mixture;
- building level;
- light rails.
The work is performed in the following sequence:
- The marking is applied using a rule or a flat rail, they also reveal the curvature of the wall.
- A thick solution of gypsum plaster is kneaded.
- The resulting solution is applied in small portions to the markings along the entire length of the lines, and then beacons are attached to it.
- A little more mixture is applied to the exposed beacons from above.
Before installing beacons, it is necessary to check the evenness of the markup with a plumb or building level.
If you can’t understand the principle of this work, you can find videos on the Internet that clearly explain how to set up mounts for beacons.
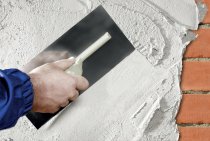
[smartcontrol_youtube_shortcode key="installing plaster beacons on the wall" cnt="4" col="2" shls="true"]Applying plaster mixture
When the mortar under the lighthouses hardens, you can start applying plaster to the wall.
- The first layer is a draft and is applied below the level of the lighthouses with a retreat from the edge of the wall by 20 centimeters.
- After applying the layer, it must be leveled from top to bottom using the rule, resting it on the installed beacons.
If a plaster layer is planned to be applied with a thickness of 10 millimeters or more, or heavy materials are used to finish the wall, a reinforcing mesh must be installed before placing the beacons.
- After the rough layer of plaster applied to the walls has dried, another layer can be applied for final leveling.

If you used non-galvanized rails or the zinc layer was damaged during work, the installed beacons must be removed after the plaster layer has completely dried. This is due to the fact that the metal from moisture can rust and further spoil the decorative coating of the wall.
- The remaining unplastered places and recesses from under the lighthouses are sealed at the level of the already applied layer.
- The corners between the ceiling, floor and wall are removed using a special trowel.

In the end, you will get a flat surface of the wall, which can be brought to the ideal with the help of grinding, priming and putty, depending on which decorative coating will be used in further work.
Cost of work
Construction and interior decorating companies offer lighthouse plastering services at the following rates:
- the price of plaster for beacons with a layer thickness of up to 20 mm in Moscow and the Moscow region is from 350 to 660 rubles. for 1 sq. m (working with a gypsum mixture will be cheaper);
- increasing the layer thickness by 10 mm in Moscow will cost you from 180 rubles. for 1 sq. m;
- wall alignment using lighthouses in St. Petersburg will cost from 250 rubles. for 1 sq. m, although many companies set prices at the level of Moscow.
The indicated amounts do not include the cost of beacons, their installation can also be paid separately, so when contacting specialists, be sure to clarify these points in advance so that the final repair amount does not turn out to be higher than expected.