Installing a partition made of plasterboard in an apartment is the best solution for dividing the interior space. Due to its versatility, this material is in high demand and popular in the field of apartment renovation. The options for its use are very diverse, but most often drywall is used for the construction of partitions with their subsequent decorative finish.

Allocates such designs with an attractive appearance, ease of installation and the possibility of doing it yourself. And the opening design possibilities make it possible to make the overall appearance of the apartment original, individual, stylish and extremely attractive.
The rigidity of the partition with plasterboard lining is given by a frame made of wooden or metal profiles. With clear step-by-step instructions, the necessary materials and tools, its construction will also not take much effort and time.

Price
How much does it cost to install a drywall partition? If you decide to turn to specialists, the construction of a partition without sound insulation with plasterboard sheathing in one layer will cost you, taking into account the cost of materials, 900–1100 rubles. for 1 sq. m in Moscow and 800-900 rubles. for 1 sq. m in St. Petersburg. The cost of a two-layer partition with noise and heat insulation will be from 1800 to 2100 rubles. for 1 sq. m in the capital and from 1200 rubles. for 1 sq. m in St. Petersburg.
If you plan to mount the partition yourself, it will cost you 2 times cheaper.
Where do we start?
Before you start installing a drywall partition with your own hands in the selected room, you need to carefully consider the future design, complete the basic drawing. It will not require specific knowledge and calculations from you, but it should reflect all the necessary parameters to the smallest detail.
- Let's start with the fact that in the selected format we will reflect on paper the dimensions of the room chosen for the partition.
- We draw the place of the desired location of the future internal plasterboard partition.
- Similarly, we perform the frontal drawing of the partition, reflecting the supporting structures and lintels.
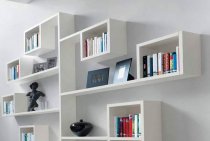
- Calculate the number of future racks will help determine the planned loads on the partition being performed using drywall during its operation. Additionally, keep in mind that the edges of the sheets of material are attached to different frame profiles. This will make it possible to evenly distribute the load over the entire plane of the frame, taking into account all the decorative elements used. Perhaps you decide to make a wall with drywall shelves.
Additionally, it is recommended to think over and paint a detailed plan of the planned work. Then, on its basis, purchase the necessary material and prepare a tool for creating a partition.

What materials and tools will be needed
For the manufacture of drywall partitions, first of all, the construction of a rigid frame will be required. It is made of a 75 mm wide galvanized profile with the help of additional elements and wooden blocks. You will need the latter to increase the rigidity of the structure in certain areas. The partition is sheathed with standard sheets 12.5 mm thick, which are fixed with self-tapping screws. Soundproofing material is laid between the plasterboard.
In addition to the materials listed, you will need your own or rented tools:
- screwdriver or a drill with an appropriate attachment.
- Laser or hydraulic level. The first option is preferable, as it will greatly simplify and speed up your work on creating a partition, and will allow you to qualitatively beat off vertical and horizontal levels.
- Five or ten meter tape measure.
- Plumb.

The process of arranging a partition using drywall can be divided into several stages, including:
- profile frame installation;
- installation of a doorway;
- sheathing of the GKL partition;
- execution of finishing.
We create the basis for the partition frame
Using drawing tools and a level on the ceiling and floor surfaces, we make markings, noting where the partition will stand.
- We fix the guide profile to the floor with self-tapping screws.
- We insert vertical guides into the profile located on the floor with a step of half a meter, we fasten them to the walls strictly vertically. At the joints of the profiles, we use self-tapping screws or a cutter to fasten them together.
- Using a plumb line, we mount the guide profile of the future partition on the ceiling.
As a result, by installing 4 profiles, we get a rectangular frame that will serve as the basis for the future frame.

Making a doorway in a partition
If the design of the partition provides for the presence of a swing door, you should take care of the space in the frame for mounting the door unit. The walls of the structure must have sufficient rigidity to withstand the expected load.
Strengthening the profile with dry, straight wooden blocks will help to give rigidity to the profile.
To install a doorway in a partition, we perform the following steps:
- We trim the rack profile to the required height, strengthen it with a wooden block inserted inside.
- We install the finished structure inside the upper (ceiling) and lower (floor) guide profile so that the width is the same in the upper and lower parts of the opening. We check the verticality of the racks with a level, and fix them with self-tapping screws.

- To make a cross beam, we cut out a piece of a rack profile corresponding to the width of the future doorway. We also strengthen it with a wooden bar.
- We set the transverse profile strictly horizontally to the required height.
The crossbar can be installed in two ways:
- Fasten the cuttings of the rails, corresponding to the width of the rack profile, on both reinforced racks, insert the prepared crossbar into them and fix.
- At the rack profile, which will serve as a crossbar, cut out the middle part, leaving the "antennae" for which it will be attached to the racks.
Important! In both cases, when connecting the profile, it is recommended to use a cutter. This will help ensure a snug fit of the gypsum board and avoid "humps" from the screws on the surface of the partition.

Using nails, we fasten wooden structures inserted into the profile.
Installation of vertical racks
We mount the rack profile, taking into account the standard width of the plasterboard (120 cm), there are 3 racks per sheet.
Since it is better to start the installation of whole sheets of drywall from the center, this makes it possible to most effectively “hide” the cutting points, so we also install the racks accordingly - from the door to the walls. The verticality of each of the vertical profiles is checked by a level.

Wiring and horizontal bars
The connection of vertical rack profiles with horizontal crossbars will add rigidity to the entire structure. The installation step is usually taken about 75 cm.
- Depending on the pitch of the vertical racks, we cut pieces of the rack profile of a suitable size.
- After assembling the frame, we lay the electrical wires (for this, the manufacturer provides special holes in the profiles).
Important! Electrical wires must be placed in a corrugated pipe.

GKL installation
Before mounting the sheets on the profile, they must be cut based on the size of the partition. For this, special tools or an ordinary construction knife are used. As a ruler, you can use the profile itself, putting it on a sheet, cut the gypsum layer with repeated movements of the knife. Then we break the sheet along the incision made, and process the edges with a special planer or chamfer with a knife at 45⁰.
In places on the partition where you plan to install hooks, mirrors, hanging boxes with shelves and similar heavy items, we recommend that you equip wooden mortgages in advance.
- We connect drywall sheets to the profile with self-tapping screws recessed 1 mm deep, their installation step is no more than 20 cm.
- To avoid deformation of the sheets as a result of natural subsidence, we leave the same gap at the bottom.
- After sewing the frame from the profile on one side, we lay a layer of sound insulation (for this we use Izover or mineral wool), only after that we proceed to sewing on the other side.

Preparing for finishing
The stage includes the following works:
- We putty the joints, pits from the hats of self-tapping screws, using special putty (or starter mix).
- We clean the surface with fine-grained sandpaper.
- We reinforce the outer corners of the partition with a profile, putty them and clean them.
- We apply a layer of finishing putty, and when it dries, we perform a thorough cleaning of the irregularities. Apply another layer if necessary.
On this, the installation of the partition using drywall can be considered completed. Acting according to the scheme described above, you get a perfectly smooth and even surface that is ready for any type of finishing work.