Fire has always given the room a special coziness. Now all kinds of fireplaces are gaining popularity again. It is clear that for most of the inhabitants of the apartments a really operating device is not available for many reasons. A successful replacement will be his electric brother. It can warm the room, and a well-designed portal for the fireplace allows you to achieve complete resemblance to a real hearth. The most convenient material for constructing it with your own hands is drywall.

Why GKL?
Portals for an electric fireplace are built from a variety of materials: brick, wood, plywood, chipboard or OSB. But one of the best options is drywall. Its advantages:
- Availability. For most fireplaces, a regular 12.5 mm wall gypsum board is suitable. For curved parts, the recommended thickness is 9.5 mm. Such material can be found in any major hardware store.
When installing an electric fireplace of solid power, it is better to choose fireproof drywallable to successfully withstand the heating temperature. A moisture-resistant variety of GKL is used if a fine finish with ceramic tiles is planned.

- Ease of processing. Assembly does not require a special tool: everything is in the arsenal of a novice master. You do not need specific skills to work with the material.
- Ease and reliability of a design. A GKL portal weighs an order of magnitude less than a fireplace made of brick or even wood. At the same time, the presence of a metal frame provides sufficient structural strength.
- Wide choice of finishes. Drywall is painted, wallpapered, lined with ceramic tiles and decorative stone. This allows you to reliably imitate noble materials and perfectly fit the fireplace into the interior of the room.
- Variety of forms. With the help of drywall, a variety of three-dimensional structures are created that are most suitable for the designer's idea.

The shape and style of the portal
Before making out a fireplace niche, they are determined with its size and style. It is preferable to buy an electric fireplace in advance, and then design a portal to it. This will avoid unpleasant moments during the final assembly of the hearth.
Of course, most people want to install a purchased fireplace in their home as soon as possible. This leads to the temptation to assemble the portal in advance by selecting the device you like in the catalog. But it is one thing to see the design of the fireplace in the photo, and quite another to construct a niche for it, relying only on the indicated dimensions. For a successful fit of the portal, you need to know a lot of little things: the size and location of the air exchangers, fasteners, features of the electricity supply.

Choosing the right style is not easy: in addition to personal preferences, you will have to focus on the overall design of the room and the features of the device being purchased. Some decorative elements may already be located on it, which determine the style of the entire portal. There are many options, so it is worth mentioning only a few recommendations:
- At the base of the fireplace, it is imperative to arrange a small elevation - a pedestal. In width, it should exceed the portal by 30 centimeters and have at least 20 cm from the floor level.
- For small spaces, corner portals are ideal to save space.
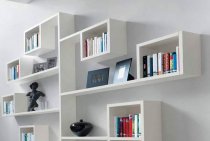
- The functionality of the design can be increased by placing additional shelves for storing various small things. They are decorated in a variety of ways, for example, decorating under the firewood.
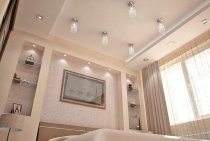
- A good solution is to combine a decorative fireplace and a TV shelf.

Materials and tools
Having decided on the style and dimensions of the portal, they make a design drawing, which indicates in detail all the elements of the frame and their size. It will allow you to accurately determine the amount of materials needed for construction. Particular attention should be paid to the firebox, because the purchased electric or decorative fireplace should fit in there as accurately as possible.
For the portal you will need:
- Drywall sheets.
- Guide and rack profiles.
- Dowel-nails size 6 × 60 for fixing the guide profile to the wall and floor.
- Small self-tapping screws for metal (“bugs”) for assembling the frame, screws for fastening the plasterboard with a length of 25–35 cm.
- Putty and primer for GKL.
- Top Shelf Material: Wood top recommended.

Standard set of tools for the installation of drywall constructions:
- Metal shears for cutting profiles.
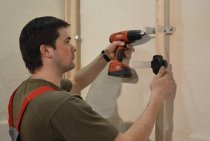
- Perforator equipped with a drill.
- Screwdriver.
- Brush, roller, spatula for preparing the assembled portal for fine finishing.
- Marking tool: pencil, square, level, tape measure.

Frame assembly
The variety of shapes and designs of fireplace portals does not allow using a single step-by-step instruction for their installation. Each case will have its own nuances of assembly work. But their general course is as follows:
- Marking is carried out: the position of the guide profiles forming the contour of the portal and the firebox is marked on the floor and walls.
- The base of the back plane of the niche, consisting of two vertical posts and two horizontal crossbars, is attached to the wall with the help of dowels. They are made from a guide profile. The height of the lower crossbar is equal to the rise of the podium on which the fireplace will be located.
- Guide profiles are attached to the wall, limiting the space of the combustion chamber.

If the firebox has a curvilinear shape, then the profile will also need to be bent. This is easy to do if you cut the guides at certain intervals. Another option is to use a flexible profile.
- Guides are fixed on the floor.
- The front racks are mounted. They are connected to the rear by crossbars, the size of which determines the depth of the future fireplace. The position of the elements is controlled by a level and fixed with self-tapping screws.
- In the same way, the pedestal racks are attached and tied with horizontal crossbars.
- At the final stage, the external vaults of the furnace and other horizontal bridges are installed, which are necessary to stiffen the structure.
The following video will help to visualize the process of assembling the frame.
Drywall installation
After creating the frame, the dimensions of its planes are checked again: they often change during the installation process. If you cut drywall according to the drawing, then the cut out elements may not fit.
GKL is cut with a painting knife:
- A cardboard shell is cut along the line on one side of the sheet.
- Carefully break the sheet, laying it on the edge of the table, and then bend it.
- Cut through the cardboard on the other side with a knife.
Curved lines are cut with a jigsaw equipped with a fine-toothed file.
On the cut fragments, it is recommended to make chamfers at the joints. It is not very convenient to remove them after installation with a knife, it is better to choose in advance using planer. Bevel angle - 45˚.

Sheathing elements are fastened with self-tapping screws in increments of 10-15 cm. The work will be facilitated special screwdriver bitdesigned for installation of drywall. Its shape does not allow you to drive the hardware deeper than necessary and wash the material.
The assembled structure is prepared for finishing:
- The seams between the drywall fragments are glued with a reinforcing mesh.
- Putty is applied on top and leveled with a spatula. The rules for puttying seams are described here.
- The recesses formed by the heads of the screws are also puttied.
- After the putty has dried, rub the seams with fine-grained sandpaper.
- The entire surface of the fireplace is primed twice. The second layer is applied only after the first has completely dried.
If you plan to finish the fireplace with artificial stone or tiles, you do not need to putty the entire surface of the structure.
Stages of creating a portal for the fireplace in the photo:
-

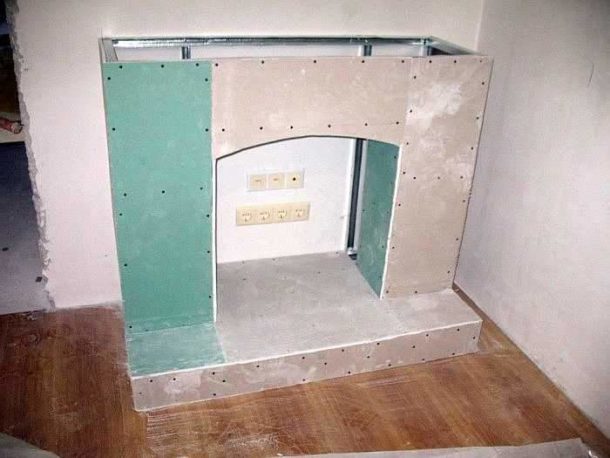
- Stage number 1: frame

-
- Stage number 2: sheathing
-
- Stage number 3: cladding
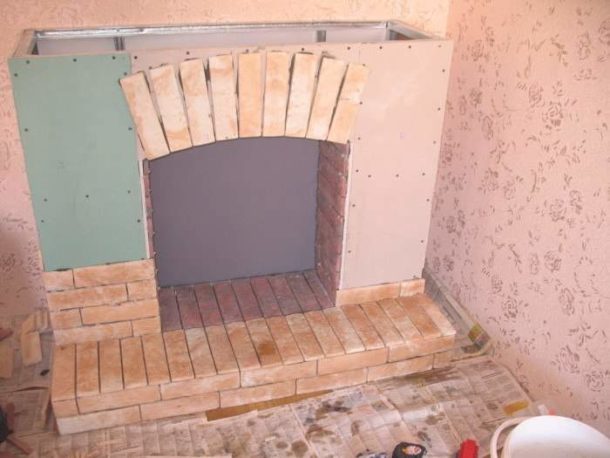
The portal for the fireplace is ready for decoration. For this, a variety of materials are used, bringing to life any bold design ideas. The design of the plasterboard portal will become a reliable basis for decorating an electric fireplace in any style the owner likes.