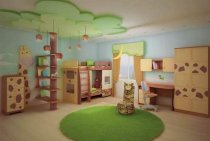
In the process of repair, many owners have a desire not only to decorate the interior of the apartment, but also to gain additional free space at the same time. An excellent solution is to replace conventional doorways with arched ones. Not all regular interior doors are used by the inhabitants of the apartment, but they take up a lot of space. Therefore, they are often simply dismantled, which does not always look aesthetically pleasing. Arches will allow you to save the existing division of the home into certain zones, save space and decorate the room. If the repair is carried out independently, then it will be useful to know how to make a drywall arch with your own hands.

Types of arches
First of all, you should decide on the design of the future arch. This is perhaps the most difficult stage in the work: an improperly selected arched opening may simply not fit into the interior of the room and will look like an alien object in it, even if it is made very high quality. Therefore, before making a drywall arch, it is better to cut out its layout at least from thick cardboard. By attaching it to the place of construction of the future drywall arch, you can make sure whether the project is successful or not, and make adjustments if necessary.

The following arch design options are most commonly used (photos will help to present these drywall products more clearly):
- "Classic" - the upper part is a complete semicircle. Requires high doorways - at least 2.5 meters.

- The Art Nouveau style is distinguished by the fact that the semicircle of the arch sharply turns into straight lines of the opening. It is better to use when making wide openings, regardless of their height.

- "Trapezoid" - the semicircle is replaced by straight lines. Such arches look good in high doorways.

- "Romance" and "ellipse" are arches with rounded corners. An ellipse has a larger radius of curvature.

All these arches can be constructed from GKL independently. In addition, semi-arches have recently become very fashionable: only one side of the doorway is rounded in them. This allows you to find very interesting design solutions for interior design. How to make a drywall half-arch? Its manufacture will not differ in any way from the installation of a conventional arch.

Markup of the future design
As already mentioned, before making a drywall arch in the doorway, it is better to make a mock-up and check how it will look on the spot. If the result suits you, then you can proceed to the markup.
On a sheet of drywall, you need to draw the end part of the arch. You can simply circle a previously made template. If it was not done, then you will have to draw everything on drywall from scratch. A rectangle is marked on the surface of the sheet, from which the future arch will be formed. On one of its wide sides (the one that will be located below) is the middle. From this point, the radius of the circle of the arch will be plotted.
Various devices can be used as a compass. This may be a piece of inelastic cord, one end attached to a self-tapping screw screwed into the center of the hole. A chalk or pencil is attached to the other end. In the same way, you can use a piece of metal profile. By lengthening or shortening such a compass, you can draw an arc of the arch of the required curvature on drywall.
In the upper part and on the sides of the doorway, it is necessary to mark the attachment points guide profiles. It should be taken into account that the future arch should be flush with the wall. Therefore, they will have to be slightly shifted inward: take into account the thickness of drywall and finishing putty.

Mounting the frame and assembling the arch
The installation process of the arch will consist of the following steps:
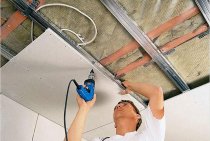
- The cut pieces of the guide profile are attached to the doorway. Walls and partitions in apartments are most often made of concrete or brick, in which case the profile is attached to dowel-nails in increments of 20–25 cm. If the partitions are made of wood, then use the appropriate self-tapping screws.

- The end sides of the arch are cut out of the drywall sheet.
It is convenient to cut drywall in a straight line with a paint knife: cut a layer of cardboard along the ruler on one side, break the element along the formed line (you can put it on the edge of the table), and then cut through the cardboard on the other side. The semicircle line is most conveniently cut with an electric jigsaw. This will turn out smoother, and the gypsum is less dusty.
- After cutting, the edges of the cuts can be cleaned with sandpaper. But it is better to postpone this procedure a little. Why - it will become clear later.
- Plasterboard blanks are screwed to the installed guide profiles with metal screws in increments of 15 cm. The caps are slightly recessed deep into the material.

- It very rarely happens that the doorway is symmetrical, and both end parts of the arch will completely correspond to each other. Therefore, it is better to remove the flaws formed when they were cut out of drywall when they are rigidly fixed to the profiles. For this, a trowel is taken (a bar stuffed with sandpaper) and both sides of the arch are polished at the same time.
- A guide profile bent in the form of an arch is attached to the lower edge of the end parts. To do this, the side walls of the profile are cut with scissors for metal. The smaller the bending radius, the more often such cuts should be made. A curved profile is attached to self-tapping screws. They must provide a secure fixation of the element, so you should not skimp here.

For convenience, you can use the L-shaped profile. It is imperative to work with gloves: the sharp edges of the profiles can seriously injure your hands.
- To stiffen the arch structure, horizontal lintels are necessary. Their length should be less than the depth of the arch by 1–1.5 cm. Interfering petals are cut off from the curved profile at the attachment points of the jumpers, after which the jumper is fixed with small metal screws. They are also called "bugs" or "fleas".
- A rectangle is cut out of drywall, forming the lower plane of the arch. Its width is selected in such a way as to cover the ends of the drywall sheets of the other two planes. The length is determined using a tape measure and a cord applied to the curved profile of the arch.
- Bend drywall element better "dry" waymaking transverse cuts at regular intervals. It is necessary to cut through only a layer of cardboard. The stronger the bend, the smaller the distance between the notches. Fastening should begin from the highest point of the arch, and then screw the screws in a mirror in both directions, gradually descending to the edges.

To visualize more clearly how you can make a drywall arch, and see what a finished arch looks like, the video will help.
Finishing
When choosing how to finish a drywall arch, you must first take care of the preparatory work, which must include the following points:
- With the help of a paint knife and sandpaper, all joints are processed.
- A perforated corner is attached to the lower semicircular edges of the arch. It will protect them from coloring in case of accidental impacts.
- The joints of the drywall arch and the wall surface are reinforced with fiberglass.
- The entire surface of the arch is puttied several times. First, the holes for the screw heads are covered, after they dry, a layer of putty is applied to the entire surface of the arch. Putty should completely cover all additional elements: fiberglass or corners.
After completing the puttying work, you can finish the arch in accordance with the chosen design of the entire room.