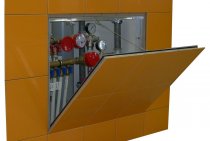
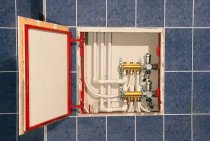
Although from a technical point of view, open pipes in the bathroom are rather a plus, since they are always accessible, you are unlikely to be ready to leave them in plain sight. A bathroom with undisguised communications leaves the impression of sloppiness and incompleteness of repairs. How to hide the pipes in such a way that the aesthetic component of the bathroom does not suffer, but in the event of an accident, they could be quickly reached? An excellent solution to the problem will be a box of GVL.

Why GVL?
A bathroom piping box can be made from drywall, gypsum boards, or plastic panels. The choice of GVL as a material for the box is due to a number of reasons:
- The GVL box can be tiled, which allows it to organically fit into the interior of a modern bathroom. A PVC box looks good only in a bathroom with plastic lining; in a bathroom finished with chic tiles, it will look out of place.
- The strength and rigidity of gypsum fiber is higher than similar characteristics of plastic and drywall, which makes it more durable and allows you to fix objects with a sufficiently large mass on it.
- Condensation may form on the cold water supply pipes. With poor-quality waterproofing, even moisture resistant drywall over time, it deforms and soaks, GVL is more resistant to moisture.

The popularity of drywall boxes is due to the cheapness of the material and the ease of working with it. However, if you want to get a reliable design that is more suitable for service in a bathroom, it is better to choose GVL.
Frame installation
The basis of the box made of gypsum-fiber sheets is a frame made of metal profiles. The use of wooden blocks in humid bathroom conditions is undesirable.
If the box will cover vertically standing pipes, the frame structure will consist of four supporting profiles. To hide vertical pipes located in the corner of the room, or horizontal pipes passing near the floor, you need only three profiles.

Measurements and markings
Accurate measurements play an important role in the construction of a gypsum fiber box. Regardless of the location of the hidden communications (horizontal, vertical, angular), you will have to measure:
- pipe length - it will correspond to the length of the profile;
- distance from the wall surface to the outer edge of the pipe.
Since the box should not take up much space, it is enough to add a few centimeters to the last value so that the pipe walls do not come into contact with the box.
Using the level, make markings on the walls, floor and ceiling.
If you need to hide several separately located pipes, you can make separate boxes for them or combine several structures into one. The latter option will look more organic, and in the voids of the box that are not occupied by pipes, you can equip the shelves.
Mounting sequence
There is nothing complicated in installing a profile for a box, let's consider the sequence of actions when installing the most common angular vertical structure.
- Install guide profiles (ud) on walls from floor to ceiling. The distance between parallel profiles is no more than 50 cm, fastening is made on dowels 40–60 mm long. The optimal diameter is 6 mm.
During installation, it is necessary to use a level to prevent deviations of the profile from the vertical.
- The next stage is the installation on the floor and ceiling of the guides that determine the volume of the product. Sections of the ud profile of the required length are mounted perpendicular to the profiles installed on the walls - this is how we get the outer corner.
- Form a vertical corner element, which will be a solid product from two interconnected guide profiles, attached to each other so that their shelves are perpendicular to each other. For connection, use self-tapping screws for metal with a length of 9 mm and a diameter of 3.5 mm (the so-called texes or bugs). Fasten self-tapping screws every 15–20 cm.
- Set the angle. To do this, connect one edge of the assembled corner element by means of texes with floor guides, the other edge with ceiling guides.
- Reinforce the structure with stiffening ribs - cd load-bearing profiles. Insert the measured and cut-to-size profiles with one end into the corner, with the other into the wall guide. Fix the profiles with texes - for one jumper you will need 4 self-tapping screws, 2 on each side.
Tip: If the walls are not perfectly aligned, pay more attention to the accuracy of your measurements. Measure the distance from the wall profile to the corner over the entire height. If the values differ significantly, you will have to use cd profiles of different lengths. If the difference does not exceed 5 mm, you can use the average value for all jumpers.
Sheathing the box with gypsum-fiber sheets
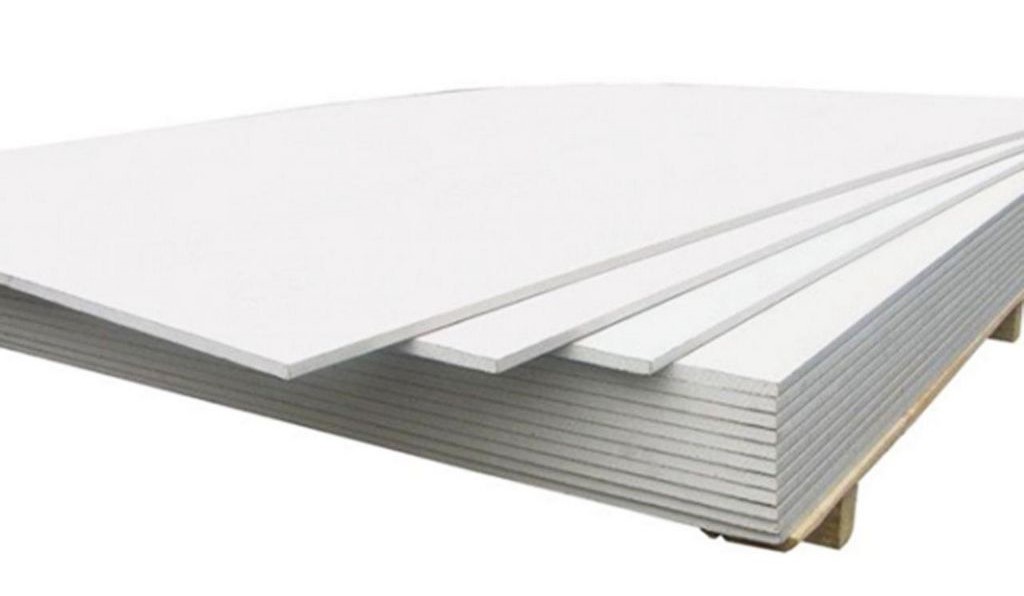
The only thing that can cause some difficulties for a non-professional finisher in the process of creating a GVL box is cutting gypsum fiber. Unlike drywall, for which it is enough to cut the top layer on both sides, after which the sheet breaks like a cookie, cutting GVL is a more time-consuming process.
Gypsum fiber cutting
It is necessary to cut the gypsum-fiber sheet only on one side, but the incision must be deep. It is not worth turning over and lifting the material in the process - it can break. The cut line must be pressed down with a rule or rail, and then break off the required piece of material in an upward motion. If the sheets are long, this operation must be performed by two people, holding the sheet while breaking off at several points at once. You can use a jigsaw for cutting, but in this case you need to be prepared for a lot of dust.
GVL installation
After the sheets of gypsum fiber are cut into strips of the required size, the first piece is screwed. It is better to start from the area where the inspection hatch for access to communications will be located. You need to cut a hole for the hatch in advance, making a preliminary markup.

To fix gypsum-fiber sheets, special self-tapping screws are used, which are self-tapping screws with a two-start thread, which is necessary for more reliable contact of materials and prevention of self-extrusion. When twisting, the cone-shaped head is completely recessed.

horizontal box
A box for horizontally located pipes is made in the same way as a vertical one, but when sheathing it, several important points must be taken into account:
- the floor inside the box should be slightly raised relative to the main surface of the bathroom floor;
- it is recommended to leave one or more holes in the bottom of the box, which will allow you to notice the presence of water in time in case of a leak.