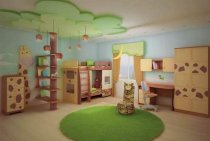
Drywall is indispensable in the design approach to repair. With it, you can not only easily and quickly align walls with ceilings, but also make the room non-standard and stylish. One of the most spectacular and interesting solutions is a backlit plasterboard niche. Let's find out how to make it yourself without much effort.

Benefits of using niches
The recess in the wall from the GKL solves several problems at once:
- Partially compensates for the space spent when leveling the walls.
- Provides convenient and reliable placement of household appliances. It is problematic to fix shelves or hang a TV on the surface of the GKL. A specially equipped niche will save the day.

- It replaces stationary furniture: shelves for storing things can be equipped in a niche.
- Allows you to divide the room into separate zones. The use of backlight greatly enhances this effect.
- Brings a certain “zest” into the interior of the room, thanks to which it becomes the one and only.

It is not difficult to build a niche from drywall on your own. The work does not require specific skills or expensive fixtures, and the necessary materials can be found in the nearest large hardware store.
Materials and tools
The purchase of material is started after the dimensions of the recess are determined and a detailed drawing of the future structure is made. Calculations are made with some margin. To create a backlit niche you will need:
- Drywall. In most cases, a conventional wall modification with a thickness of 12 mm will do. For rooms with high humidity, moisture-resistant GKL is used. Refractory is used if the niche is combined with a powerful electric fireplace.

- Guide and rack profile. The frame made of galvanized metal profile is stronger and more durable than wood.
- Fasteners: dowel-nails, small self-tapping screws for metal, or “fleas”, for connecting profiles and longer ones, 25–30 mm in size, for mounting drywall.
- LED strip and controls or spotlights.

From the tools you need to prepare:
- Perforator. With its help, holes are drilled in the wall for dowels, through which the guide profiles are fixed.
- Screwdriver. It is very problematic to screw a large number of self-tapping screws into the metal with a screwdriver. Not bad to buy special bit for drywalllimiting the depth of the screw.
- Metal scissors. It is better to cut off the necessary profile fragments with them, and not with a grinder.
- A spatula, brush and roller are useful for processing the mounted structure before finishing.
- Measuring and marking tools: tape measure, level, square, pencil, plumb line.

Frame assembly
According to the drawn up drawing, it is necessary to make markings. Mounting guide profiles are marked on the walls, ceiling and floor. Start marking from the ceiling, transferring lines to the floor with a plumb line. This will allow you to maintain the entire niche in a single plane. The dimensions of the future recess are indicated on the wall.

Profiles mounted:
- Guides are attached with dowels in increments of 35–40 cm. Previously, a damper tape is glued to their back sides adjacent to the ceiling.
- By installing guides on the floor, ceiling and walls, they mount vertical racks. The profiles are cut so that they are slightly smaller than the nominal size, inserted into the guides and fixed with “bugs”. The correct installation of each rack is checked using a level.
- Horizontal jumpers are being installed. They form the inner space of the future niche and give rigidity to the entire structure. Also, drywall fragments will be joined on the lintels.

If you plan to equip the niche with shelves, then the jumpers should be located according to the distance between them. The lower plane of the recess, on which household appliances will be installed, should be further reinforced with a profile.
A niche may have curved planes. Then, for mounting the frame, you will need a special arched profile.

You can also cut on the guide rails at certain intervals, as shown in the photo. The smaller the bending radius, the more often the cuts are made. The profile processed in this way can be easily bent to the required angle.

Plasterboard cladding
Before installing the GKL, electrical wiring is laid, removing it into cable channels or fireproof corrugations.
The GKL sheet is cut into suitable fragments.
ibuilder.decorexpro.com/en/ recommends: take the necessary dimensions from the frame, not from the drawing. During the installation process, changes in the dimensions of the structure are possible, and if the measurements are incorrect, the pieces of the plasterboard will not fit together.
Cutting is carried out as follows:
- Marking lines are applied to the GKL.
- With a paint knife, a layer of cardboard is cut through on one side of the sheet, after which it is carefully broken and turned over.
- The upper coating is cut through from the second side (as in the figure).

- The cut is processed with fine sandpaper. If a junction of fragments is planned at this place, then using special planer chamfer is made at an angle of 45˚.
- Sheathing starts from the inside of the niche. Fragments lying in perpendicular planes are mounted so that one element covers the end of the second.
- Drywall is fixed with self-tapping screws in increments of 25-30 cm, slightly sinking their hats into the material. When using a special bit, the risk of damaging drywall sheets is minimized.
- Special corners are attached to the outer corners of the structure, protecting the fragile drywall from damage.

After cladding, the surface is prepared for fine finishing:
- The seams are glued with fiberglass reinforcing mesh and covered with putty. The rules for processing seams are described in detail here.
- After the putty has dried, they are rubbed with fine sandpaper.
- The entire surface of the niche is treated twice with a universal primer. After applying the first layer, wait for it to dry completely, and only then apply the second.
- The last stage is the puttying of the entire structure according to standard technology. If the niche will be tiled, putty is not needed.
Lighting installation
The best choice for niche lighting is LED strip. Installation of spotlights is more difficult and more expensive.
The recess in the wall with backlight can be made in two ways: fix the tape directly on the surface of the niche or remove it behind a special ledge. For the second case, a side is pre-mounted along the edge of the niche. You can run it from a guide profile, masked by a strip of drywall.

When installing lighting, observe the following instructions:
- Measure and cut the tape to the required length. Do it carefully, in the places marked for such cases. If necessary, grow the tape by soldering the contacts or using special connectors.
- Connect the LEDs to the control unit. It is important to observe the polarity of the connection. It is recommended to select the power of the transformer with a margin of 20-25%.
If the total length of the tape is more than 5 meters, connect individual pieces in parallel: this way the glow of all LEDs will be uniform.
- Apply voltage and check the backlight for operation.
- After checking, remove the power supply inside the structure. Stick the tape in the desired location. Pay attention to the fact that it does not come into contact with the metal of the frame or other elements.
As you can see, arranging a backlit niche is not such a difficult task. To get more detailed explanations on each stage of work, watch the video and ask questions to our expert in the comments. ibuilder.decorexpro.com/en/ is always happy to help!