The main problem in the installation of stretch ceilings, which are becoming increasingly popular among the population, are various communications that run in the upper part of the room. In order for them not to spoil the overall picture, you can hide them in a drywall box under a stretch ceiling. In addition, additional lighting placed in such a design is much more convenient to install and maintain. In addition, the use of GKL boxes expands the number of possible ceiling design options almost to infinity.

What box configuration should I choose?
Stretch ceiling in an apartment with a drywall box, it can have a different shape. The simplest and most commonly used option is a rectangular box around the perimeter of the room. It is also very easy to install.
Mounting a curved box is a little more difficult, but in this case, drywall is the most suitable material. Designs can also be multi-level, if the height of the room allows it. It makes no sense to describe them all, but some basic requirements or nuances can be distinguished:
- When designing, it is better to use the services or at least the advice of professional designers. It is quite difficult to imagine how the whole structure as a whole will look in the end. The placement of fixtures, the configuration of the box, the color and type of stretch ceiling film, the division into zones - it is quite difficult to take into account all the points. And it will be very disappointing to spend time, effort and money, and get an unsuccessful result.

- The drywall box on the ceiling must be deep enough to accommodate recessed lighting fixtures. If it masks communications, for example pipes, then it is imperative to provide a gap of 5-6 cm between them and structural elements. Otherwise, undesirable consequences can be obtained, such as the transmission of vibrations from pipes through the box or the destruction of drywall by condensate formed on them.
- The level of the stretch ceiling will eventually be located slightly above the level of the suspended structure of the box.
- For the installation of a stretch ceiling, it is more expedient to invite specialists, since this work will require not only special skills, but also expensive equipment.

What tools and materials do you need to prepare?
Taking into account the fact that only a drywall box will be mounted independently, and the installation of a stretch ceiling will be carried out by specialists, not so many tools will be required:
- Instrument for measuring and marking: laser or water level, tape measure, plumb line, masking cord and square.
- Perforator for drilling holes for dowels in the ceiling and walls. You can get by with an impact drill, but it does not always cope with reinforced concrete floor slabs.
- Screwdriver for fastening profiles and drywall.
- For cutting sheets - a painting knife with replaceable blades.
- Metal shears come in handy when working with profiles.
- Hole cutter for cutting holes in drywall for lamps.
- A set of spatulas for puttying the box for finishing.

Before purchasing the material, you can not do without drawing up a detailed drawing. It is with its help that the required number of various structural elements of the box is determined. It is recommended to purchase material with a small margin. To equip a drywall box, you will need:
- Guide and ceiling profile, marked with the letters UD and CD, respectively. When installing complex structures with several levels and curved surfaces, other types of profile can be used.
- Direct hangers. Their number is calculated according to the drawing.With a considerable depth of the box, wire hangers are used, since the length of the straight lines is no longer enough to fix the profiles.
- Fasteners: dowel-nails with a diameter of 6 mm, small self-tapping screws for metal - “fleas” or “bugs” for fastening profiles, single-level connectors (“crabs”), self-tapping screws 25 mm long for fixing drywall.
- When puttying the box, perforated corners are useful for finishing external corners.
- Drywall sheets, the number of which is also determined using the drawing.

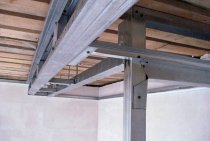
Wireframe layout
First of all, it should be noted on the wall the lower border of the manufactured box. If the structure is multi-level, the location of each of the levels is marked.
- Using a tape measure, a point is marked on the wall corresponding to the depth of the drywall box.
- Using a laser or water level, mark the points of the lower boundary at the corners of the room. It is recommended to connect them with a line using a masking cord.
- The marking of the guide profiles on the ceiling is applied. In the case of a rectangular box, everything is quite simple: with the help of a square and a tape measure, the width of the structure is set aside, and the line can be drawn using the same masking cord. It is more difficult with a figured ceiling: the easiest way is to make a template from thick cardboard, and then circle it on the ceiling.
- The center lines of the supporting profiles are marked on the ceiling. It is recommended to place them through 600 mm. The locations of perpendicular jumpers are also marked, if necessary.
- Direct suspensions will be attached to the center lines. If the carrier profile has a length of no more than 60 cm and one of its edges is rigidly fixed in the guide on the wall, then one suspension is sufficient. For longer lengths, a minimum of two products will be required.

After the marking stage, it is recommended to carry out preparatory work for the installation of fixtures: mark and drill holes for their fastening, bring the wires, enclosing them in corrugated sleeves. You can do this later, but then the installed frame elements will interfere.
Profile mounting
- Guide profiles are attached to the wall and ceiling with dowel-nails. If the design is curly, then the profiles will need to be bent. To do this, the side shelves are cut with metal scissors at the bend, after which the profile will easily take the desired configuration. If you need to bend it inward, then the cutouts on the side surfaces are made in the form of a triangle: so the petals will not run into each other.
- Holes are drilled, the required number of hangers is installed.
- The bearing profiles are mounted according to the level, fixed with “fleas” in the guides and direct hangers.
- A segment of the guide is put on the ends of the supporting profiles, which will be the outer edge of the frame, and fixed with self-tapping screws or cutter.
- The necessary jumpers are being installed. The more of them, the more rigid the structure.

Final stage
Drywall sheets, pre-cut to size, are attached to the assembled frame. The screw pitch is 25 cm. It is not recommended to join drywall sheets in the corners: this can lead to cracks.
The seams between the sheets are glued with reinforcing tape and puttied. Putty also covers the holes from the screws. Perforated corners are attached to the outer corners. After drying and applying the finishing layer, you can install fixtures and call professionals to install the stretch ceiling.