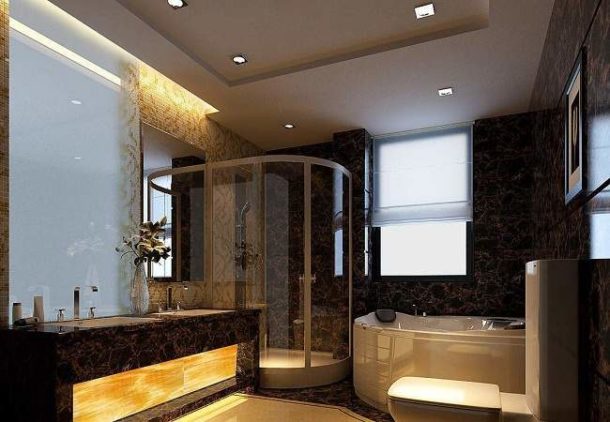
The ceiling is the most conspicuous part of the interior of any room, including the bathroom. It should be not only smooth and beautiful, but also practical. This can be achieved easily, quickly and with minimal financial costs using drywall sheets. Consider step by step how to mount a plasterboard ceiling in the bathroom.

Why GKL?
Like any other, this material has its pros and cons. Benefits of using drywall construction in the bathroom:
- Pretty simple installation, accessible even to a novice master.
- Ceiling installation does not require special expensive tools. Common materials are used, which can be found in any major hardware store.
- In the space behind the new ceiling plane, spotlights can be placed or forced ventilation elements can be hidden there, which is especially important for a bathroom or a combined bathroom. If necessary, insulation or sound insulation can be placed in this space.
- Drywall is compatible with all finishes. The easiest solution is to cover it with waterproof paint of the chosen color.
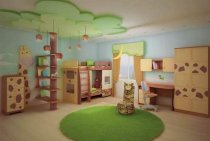
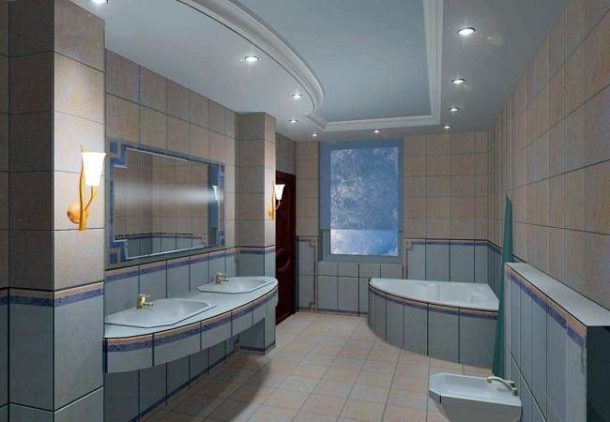
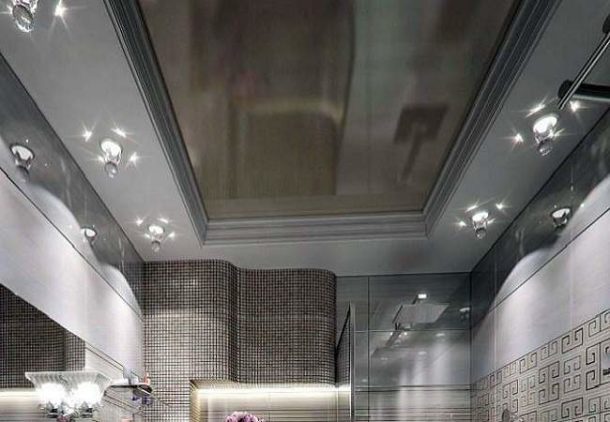
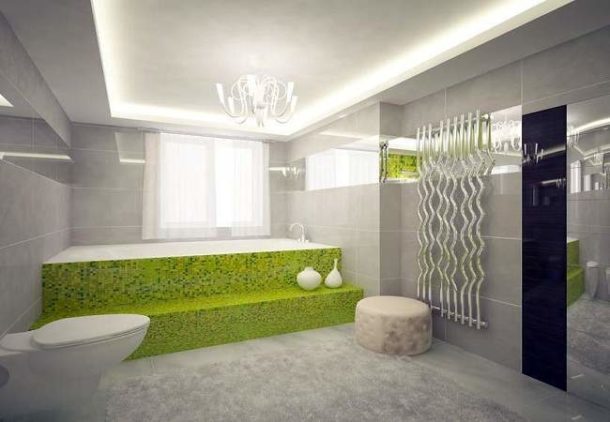
- Finally, not only flat, but also multi-level structures can be created from gypsum boards, fitting them as organically as possible into the interior of the bathroom and achieving the uniqueness of its design. Some interesting design solutions are presented in the photo.
-

- Squares on the ceiling
-
- figured design
-
- The combination of a box of plasterboard and a glossy stretch fabric
-
- rounded shapes

-
- With hidden illumination
Cons of plasterboard ceiling in the bathroom
Of course, there are also disadvantages:
- Suspended ceilings reduce the height of the room. Minimum for the thickness of the profile used when mounting the frame.
- Drywall, even if it is moisture resistant, is not designed for constant contact with water. The design of the ceiling requires careful finishing after installation to prevent moisture from penetrating under its surface. This can lead to the formation of mold or fungus under its plane, which will inevitably lead to quick dismantling and repair. Therefore, it is necessary to putty and seal the seams very carefully.
Features of using plasterboard for the ceiling in the bathroom
When planning to create a plasterboard ceiling in the bathroom, you need to take into account several important nuances:
- In a room such as a bathroom, only moisture resistant drywall. It is quite easy to distinguish it from the usual one: the sheets are painted green and are marked GKLV.

- The false ceiling frame is made of galvanized metal profile. It is more resistant to moisture than wood.
- The base plane under the ceiling surface is carefully treated with an antiseptic solution.
- If you plan to mount any massive interior details, then the frame is reinforced in advance in these places.
Materials and tools
After the necessary measurements have been made and a drawing has been drawn up, you can stock up on material. You will need:
- Moisture resistant drywall.
- Guide and ceiling profile.
- Direct hangers for leveling the ceiling.
- Fasteners: dowel-nails, metal screws.
- Sealing self-adhesive tape.
- Reinforcing fiberglass mesh.
- Putty and primer for drywall.
Important! In the bathroom, you can not use gypsum putty that is afraid of moisture. Suitable waterproof cement or polymer mixture.
As already noted, the work does not require a special or rare tool. You will need:
- Perforator with the right drill.
- Screwdriver. Very useful special bit, designed to work with drywall: it limits the depth of screwing in the screw. This allows you not to wash the material during installation.
- Metal shears to cut the profile.
- Spatula, brush and roller for grouting and priming drywall.
- Painting knife.
- Marking and measuring tool: tape measure, level, square, pencil.
Frame installation
After the preparatory work, which consists in removing loosely attached elements of the old coating and applying an antiseptic, marking is carried out:
- At a selected distance from the base plane, the location of the guides is applied using a level.
- The attachment points of the carrier profile are marked. The step between these elements should correspond to the dimensions of the drywall, usually it is 60 cm.
If the bathroom is small, then it is not necessary to make perpendicular jumpers. The rigidity provided by the GCR fragments is quite enough.
- On the lines of fastening of the carrier profile, the places of installation of direct suspensions are marked.

After marking, the frame is assembled:
- The plane of the guides adjacent to the wall is pasted over with a damper tape. After that, they are mounted using dowel-nails in increments of 40–60 cm.
- Holes are drilled in the ceiling and straight hangers are attached.

- Bearing profiles are cut to length and inserted into guides. It is recommended to make them smaller than the required size by 1–1.5 cm. After that, they are fixed with metal screws.
- By controlling the level of the position of the carrier profiles, they are fixed with direct suspensions. There are a number of holes in this fastener: the screws are screwed into one of them, after which the protruding parts of the suspensions are bent towards the ceiling.
- If necessary, perpendicular jumpers are attached in the same way.

You can connect the profiles into a grid using the following technique: the jumper is cut off 2 cm more than the desired size, after which the side shelves are removed at its ends and the tongue is bent. It is fixed with self-tapping screws to the carrier profile. For reliability, you can also use crab connectors.
The assembly of the frame is described in more detail in this article.
Installation and processing of drywall
Having finished assembling the frame, they stretch the necessary communications and prepare the fastening of lamps or other devices placed in the ceiling cavity. After that, drywall is fixed:
- Fragments of the required sizes are marked and cut. It is easier to do this with a paint knife: a cut is made on the cardboard on one side, then the sheet is gently broken along this line and the cardboard is cut off on the other.
- In the places where the pieces of gypsum board are joined, chamfers are made at an angle of 45˚ using a paint knife or an edge planer.
- The cladding elements are fastened with self-tapping screws to the profiles in increments of 20–25 cm. They should be joined only on the profile surface.

Having finished the installation of drywall, the resulting plane is processed:
- A reinforcing mesh is glued to the seams. You can put a little putty on the joint and press the mesh into it.
- Putty gap is sealed flush with the plane of the ceiling.
- After the mixture dries, the seam is rubbed with fine sandpaper. See the rules for sealing joints and videoshere.
- The holes formed by the self-tapping screws are also sealed and overwritten.
- The entire surface of the ceiling is primed twice with a universal composition. The second layer is applied after the first has completely dried.
As the putty is fully set, the ceiling can be painted or subjected to another finish. Before painting, the surface must be puttied with waterproof putty in several layers. Read on for how to do it right. here.
Accuracy and care during work will ensure the quality and durability of the plasterboard ceiling in your bathroom. The installation process is clearly shown in the video.