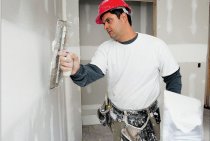
Sheathing the interior of the GKL usually involves the preliminary installation of the frame on which the sheets are attached. However, such installation is unprofitable for small apartments: the crate, together with the material, will take up part of the usable space. In such situations, it makes sense to glue drywall on the wall in a frameless way, directly on the base. This method is simple and quite accessible to beginners. The main thing is to strictly follow the sequence of actions, so it is worth considering all the stages of installation in detail.

Important! Drywall is attached to glue when leveling walls with differences not exceeding 5 cm. With greater curvature, the consumption of the composition is unreasonably large, so it is more expedient to use the frame method.
Required Tools
Professional finishers usually use the following set of fixtures:
- Notched trowel - needed for applying glue to the surface of the sheet in the case when the curvature of the wall does not exceed 5 mm.
- Trowel - will be required to stir the adhesive and apply it to the base if the unevenness of individual sections exceeds 15 mm.
- Container for mixing glue. It is better to choose a plastic container that is easy to clean from dirt.
- Mallet - will help align the sheets after they are fixed.
- Building level - necessary for marking.
- A knife, pencil and tape measure will help you correctly mark and cut the sheets.
- Drill with a crown - for forming holes in the GKL.

Compositions used for installation
The choice of adhesive composition is one of the key stages of the work. The mixture must be selected based on the surface material and fastening technology. The modern construction market offers the following options:
- Special plaster glue. The most popular composition is Perlfix from KNAUF (see photo below). Other adhesives intended for GKL are also suitable, for example, Volma Montage.
- Gypsum and cement based plasters.
- Putties for starting and finishing. It is recommended to use special high-strength compounds, for example, Knauf Fugen (Fugenfüller).
- Tile adhesive (any). The Ceresit SM 11 product has proven itself well - a dry composition based on cement with mineral fillers.
- Silicone sealants based on acrylic and polyurethane, "liquid nails", assembly adhesive. These compounds are only suitable for fastening to a very flat wall or when gluing GKL to GVL or to another sheet of drywall.
- Mounting foam. It is necessary to select a material with a minimum coefficient of expansion.
When attaching GKL to foam with your own hands, you need to keep in mind that this is the most time-consuming method, not suitable for doing it alone. GKL must be constantly maintained and leveled, pressed against the wall until the foam hardens, or fastened with dowel screws. The method enjoys a certain popularity, but experienced craftsmen do not recommend using it for beginners.

Wall preparation
There are several ways to stick GKL sheets on the base, but any of them requires preparatory work. They include the following steps:
- From the walls remove old coatings, protruding screws and nails.
- With frameless drywall fastening, electrical wiring is laid in strobes, landing sockets for sockets and switches are made in the right places.
- wall surface primed. To increase adhesion, it is better to use the composition with quartz sand "Concrete-contact".
It is not necessary to plaster the floors, but the brick bases can be leveled with a cement-sand mortar. The sheets themselves also need some preparation: they are adjusted to size, cut in length and width, taking into account window and door openings, make holes for sockets and switches.

markup
With the adhesive installation method, drywall sheets are usually installed vertically, which must be taken into account when marking out the internal space. This is true for apartments with a standard wall height - one sheet 2.5 m long is just enough to close the space from floor to ceiling. If we are talking about "Stalinka" or private houses, where the height of the walls often exceeds 3 meters, this rule does not work, so the sheets can be installed horizontally. The marking is carried out in such a way as to minimize the number of joints and symmetrically glue the entire GKL.

If the installation of drywall is carried out in order to level the walls, you need to do the following:
- find the two most prominent areas and draw a line between them;
- from the first line, retreat a distance equal to the thickness of the sheet, and make a control mark;
- using a building level or a plumb line, transfer both features to the ceiling.
Installation of sheets on a flat wall (with differences up to 5 mm)
If the unevenness of the base surface does not exceed 5 mm, the instructions for gluing drywall to the wall will look like this:
- The sheets are cut to the desired size, the reverse side is covered with glue: the composition is applied in wide stripes around the perimeter and in the center.
- Linings 10-15 mm thick are installed on the floor near the wall, on which the sheet is placed.
- GKL is pressed tightly against the ceiling, aligned in accordance with the markings made earlier.

Installation starts from the corner. If the walls of the room have the correct geometry, the sheets can be bent 90 degrees at the junction, making a cut with cutters. The linings are removed after the glue has hardened (preferably after 2–3 days), the remaining gaps are sealed with sealant.
Important! Work is recommended to be carried out at an air temperature of +15 ... +20 degrees, the recommended humidity is not more than 70%.
Wall mounting technology with unevenness up to 2 cm
With such a curvature value, work is performed according to a slightly different scheme. Here, the glue is not applied with wide strokes, but is applied with cakes, the diameter of which is 15 mm and the height is 25 mm (it should be greater than possible irregularities). Such heaps are evenly distributed over the entire surface of the leaf with an interval of 20–30 cm.
Further, the GKL is installed on linings, tightly pressed against the wall. The correct installation of drywall is checked by the building level. As a result, the adhesive is distributed throughout the internal space, leveling the unevenness of the base.

Installation on walls with differences of more than 2 cm
If the surface is curved, this is not a reason to refuse to stick drywall. To avoid preliminary alignment, beacons are required - strips 10 cm wide cut from a sheet.
- Before installation, the surface is marked around the perimeter. These lines will serve as a guide for placing the dots.
- A kind of frame is created from the cut beacons. Horizontal strips are glued at the floor level and under the ceiling, which will serve as a guide (see previous image).
- Then vertical lines are launched from them, performing the function of a crate.
The main thing is to be accurate, so each strip is leveled, the entire surface is controlled as a whole. While the adhesive composition has not yet seized, the position of the strips can be corrected.
- When the frame is securely attached to the base, proceed to sticking drywall. Glue is applied to the beacon strips over the entire surface, the sheets are lifted and pressed.
To save GKL, instead of stripes, you can use 10 × 10 cm squares as beacons.

Finishing
Of course, the installation of GKL is not the final stage of interior decoration. Usually the walls are painted or wallpapered. Despite the smooth surface of drywall, sheets need to be prepared before final coating.
Here is a step-by-step workflow:
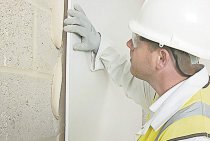
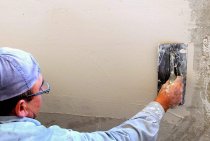
- If there are no factory chamfers on the edges of the sheets, they are cut with a knife. The joints between the sheets are filled special putty for plasterboard joints. To do this, the composition is kneaded in accordance with the manufacturer's instructions, the joints are evenly smeared using a narrow spatula.
- While the composition retains plasticity, a reinforcing tape is pressed into it, which will be covered with a second layer. Learn more about seams here.
- Re-puttying is done after 10-12 hours, when the first layer hardens. After that, the protruding surfaces are cleaned with sandpaper.
- Now the sheets need to be primed, wait for the composition to dry completely.
- Then the first layer of putty is applied, which must also dry.

- If the surface does not meet the requirements, priming is performed again and a second layer of the mixture is applied.
- After drying, the surface is treated with fine-grained sandpaper.
- At the final stage, another layer of primer is applied to the putty, they wait for it to dry and proceed to the finishing of the room.
You can familiarize yourself with all the stages of gluing drywall to the base in detail by watching the video. The workflow is clearly presented here, which will be useful for beginners.
If after reading the article, viewing photos and videos, you still have questions, ask them in the comments: a GKL installation specialist will answer you.